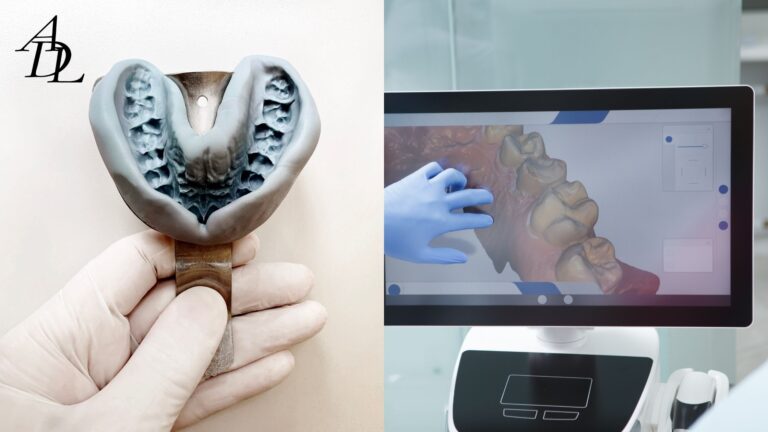
Digital dentistry lives and dies on data integrity. A beautiful restoration can only be as accurate as the model beneath it. In the world of intraoral scanning, small mistakes—especially scan stitching errors—snowball into distorted arches, open contacts, high occlusion, or even full-on remakes. The good news: most intraoral scanner errors are preventable with systematic technique, a smart scanning strategy (IOS), and a disciplined final verification routine.
In this guide, you’ll learn exactly how intraoral scan errors arise, where to find them before you send a case, and how to fix them on the spot. You’ll get practical, chair-side checklists, real-world examples, and a lab-tested QA workflow used by full-service labs like Associated Dental Lab in Los Angeles—integrated with modern CAD/CAM and 3D printing—so you can ship clean data the first time.
The Fundamentals: What “Stitching” Really Means
How stitching works
An intraoral scanner captures thousands of overlapping images (frames). The software “stitches” those images into a continuous mesh by matching geometry and texture. When overlap is sparse, geometry is feature-poor, or movement disrupts alignment, the software guesses. That’s where digital impression errors begin.
Why stitching fails
- Insufficient overlap between passes
- Uniform/feature-poor surfaces (long edentulous spans, glossy enamel, flat palatal vaults)
- Motion artifacts (hand speed, patient movement, saliva ripples)
- Light contamination (headlamp/operatory light interfering with the scanner’s wavelength)
- Breaking the scanner’s recommended path mid-arch or on a return pass
Multiple educational and clinical sources point to light contamination, overscanning, improper path, moisture, and incomplete bite capture as common culprits—each capable of corrupting the global mesh or the bite relation. Spear Education
Primary Failure Modes of Intraoral Stitching
1) Local misalignment (micro-stitching drift)
Small but accumulating frame-to-frame mismatches create subtle “waving” of cusps or a double contour along the scan path. Expect contacts that look acceptable in software but seat tight or open at delivery. Operators often mistake this for milling error, when the root cause lives in the mesh.
Red flags
- “Ghost” edges or faint duplicate anatomy
- Wavy marginal ridges on the preview
- Cusps not vertically aligned when you rotate the model
2) Global distortion (macro-drift across the span)
The classic full-arch scanning errors scenario: the model looks okay locally, but the terminal segment doesn’t register with the start segment, so the arch closes long/short or twisted. Full arches are more vulnerable because small drift adds up over distance. Clinical literature and hands-on training emphasize arch-length accumulation and return-path mistakes as prime drivers. Spear Education
Red flags
- Midline shift relative to palatal rugae or incisive papilla
- Asymmetry between right/left posterior occlusal planes
- Cross-arch contacts that don’t look parallel when inspected from the occlusal view
3) Texture/reflectivity failures
Pooling saliva, shiny zirconia or metal, and highly reflective enamel can trick the camera—frames won’t match reliably, producing “holes” or lumpy patches.
Red flags
- Random voids in otherwise smooth anatomy
- Rough, “crystallized” surfaces after the same area is scanned repeatedly
- Islands of mesh floating slightly above the surface
4) Soft-tissue interference
Moving cheeks, tongue, or collapsing gingiva block preparation margins and confuse matching. Inadequate retraction is repeatedly cited as a major source of intraoral scanning mistakes (operator vs patient factors)—especially in the anterior where mobile tissue overlaps margins. Wiley Online Library
Red flags
- Margin band disappears when you rotate retro-gingivally
- Tissue “bridges” that fuse buccal and lingual scans
5) “Veersing” and loss of positional awareness
In some scanners, the software can “lose awareness” of its exact position and begin layering errant duplicates—think double images of the same cusp or a sudden jump in the mesh. This phenomenon has been described as “veersing.” cad-ray.com
Red flags
- Duplicated cusps or abrupt step-offs after a pause
- A sudden, localized mismatch when you resume scanning
6) Bite registration mismatches
A separate but critical category: bite registration scan error. If buccal bite scans lack coverage of stable landmarks (e.g., multiple cusp tips bilaterally) or include open contact movements (tongue push, mandibular slide), the occlusion you send won’t be the occlusion the lab designs to. Expert lab sources and clinical articles emphasize disciplined bite capture for reliable occlusion. Perio Implant Advisory
Red flags
- Occlusion preview shows unilateral contacts only
- Models mount with visible cross-arch cant that wasn’t present clinically
Operator vs Patient Factors: Who’s “at fault”?
Operator-driven intraoral scanning mistakes
- Speed/hand motion: sweeping too fast or rocking the tip
- Path deviations: ignoring the vendor’s recommended scan path
- Over-scanning: repeatedly rescanning the same zone creates mesh noise
- Lighting: headlamp/OP light washing the field
- Moisture control: scanning through saliva strands or pooled fluids
These are well-documented in clinical education and lab QA reports. Spear Education
Patient-driven contributors
- Movement: jaw shifts, tongue thrust, or swallowing during capture
- Soft tissue collapse: insufficient retraction in mobile gingival zones
- Reflective surfaces: metal restorations, polished zirconia without matte spray
- Limited opening: reduces angle and overlap in posterior zones
A 2023–2025 body of literature underscores scanner selection, ambient light, operator skill, patient anatomy, and calibration as combined influences on accuracy—none acting alone. PMC
The 10-Minute Pre-Send QA: A Lab-Style Checklist
Use this quick, repeatable protocol to catch intraoral scanner errors before you submit:
- Global view first
- Rotate occlusal, buccal, and lingual. Check midline, curve of Spee/Wilson symmetry, and cross-arch parallelism (upper vs lower).
- Landmark verification
- Incisive papilla alignment; palatal rugae symmetry; stable molar landmarks align across the arch.
- Margin integrity (for fixed)
- Circumferential visibility with no tissue bridges; no “step-offs” from composite rescans.
- Rescanning mesh holes stitching
- If you fill a void, ensure overlap with stable nearby geometry (pit/fissure patterns) and re-evaluate for duplicates.
- Texture sanity check
- Look for “sugary” artifacts from overscan; stop if the surface starts to crystallize and delete/replace with one clean pass.
- Buccal bite validation
- Bilateral coverage of at least 3–4 cusp tips per side; verify intercuspation looks like it did in the mouth; add a second buccal bite if uncertain.
- Model measurement spot-checks
- Verify a known distance (e.g., width of a known crown or a calipered gap) if your software allows.
- Scan completeness
- For full-arch scanning errors, confirm distal of terminal molars and tuberosity/retromolar pad are represented; no tapered “tail” endings.
- File hygiene
- Delete bad passes rather than burying them under more data; re-stitch with clean overlap.
- Communication note to lab
- Attach notes/screenshots: margin hint, pontic site, implants, areas of limited tissue control. Labs using modern portals accelerate cases when the incoming file includes concise notes.
Proven Scanning Strategy (IOS): Vendor Paths + Practical Tactics
Follow the designed path
Scanner developers design recognition pipelines around specific acquisition paths. Deviating—especially on return passes—invites drift. This is repeatedly flagged as a BIG source of intraoral scan errors.
Generalized path tips (adapt to your device manual):
- Maxillary: occlusal sweep from molar to molar → palatal/lingual return → buccal perimeter
- Mandibular: occlusal sweep → lingual return (watch saliva pooling) → buccal perimeter
- Edentulous segments: include landmarks (rugae, tori, frenula, tori edges); add intentional overlap from different angles
- Bite: buccal bite capture with patient gently closing into MIP; avoid one-sided captures
Control the environment
- Lighting: dim or redirect headlamp/OP light to avoid sensor washout.
- Moisture: isolate with cotton rolls, high-vac suction, bite blocks; dry, scan, re-wet tissues if needed to prevent tearing.
- Reflectivity: apply non-pigmented matte spray very lightly on hyper-reflective crowns/abutments (if your system recommends it).
Slow is smooth; smooth is fast
Excessive speed creates gaps in overlap. Maintain a constant, moderate sweep and a consistent working distance from the surface.
Manage rescans surgically
When you must patch, delete the bad area and re-scan with generous overlap anchored to stable landmarks; do not stack rescans over noisy mesh.
Recognizing Errors in Real Time: On-Screen “Tells”
Visual cues you can trust
- Double anatomy: see two faint versions of the same cusp or margin
- Sudden steps: the mesh jumps height between adjacent tiles
- Texture change: smooth enamel becomes grainy after repeated passes
- Anatomy drift: marginal ridges don’t meet cleanly at contact points
- Arch mismatch: the start and end of a full-arch route don’t close neatly
Software tools to use
- Cross-section planes: slice through the prep/abutment to confirm clean, continuous margins
- Color maps/heat maps: highlight thin/over-scanned areas and holes
- Occlusion preview: verify bilateral contacts; look for canting or unilateral hits that contradict the clinical picture
Bite Registration: The Most Expensive Two Seconds You’ll Ever Save
A perfect prep scan with a sloppy buccal bite is still a remake. Common bite registration scan error patterns include unilateral capture only, cheeks blocking cusp landmarks, and mandibular slide during capture. Education and lab guidance consistently stress disciplined, bilateral, landmark-rich bite data. Perio Implant Advisory
Protocol
- Dry buccal corridors and cusp tips bilaterally.
- Have the patient close gently into habitual MIP; stabilize the mandible if needed.
- Capture both sides with at least 3–4 cusp tips per quadrant.
- Validate in software: check for bilateral occlusal stops consistent with the mouth.
- If uncertain, take a second buccal bite—it’s fast insurance.
Full-Arch Scanning: Risk Factors and How to De-Risk
Full arches magnify intraoral scanner errors because small drift accumulates over distance. Educational resources and operator feedback agree on the following de-risking tactics:
- Anchor early and often to recognizable landmarks (incisive papilla, rugae, prominent cusp tips).
- Use cross-arch overlap on return passes; avoid “string-line” paths with minimal lateral coverage.
- Segment your route (posterior → anterior → posterior) with deliberate overlap rather than one long sweep.
- Mind edentulous spans: add angled passes to introduce geometric variety.
- Consider a conventional impression when geometry is severely feature-poor or patient factors are unfavorable. Knowing when to scan vs when to PVS supports accuracy, speed, and case predictability.
Rescanning Mesh Holes & Patching Without Compounding Error
When you see a void, it’s tempting to “paint until it fills.” That often creates lumpy, de-registered texture. Instead:
- Delete the noisy region (don’t stack on top).
- Re-isolate and dry the area.
- Re-scan with overlap anchored to stable, textured anatomy (pit/fissure patterns, line angles).
- Confirm continuity by rotating the model and running a thin cross-section through the patch.
- Stop early if the surface turns granular—granularity is a sign of overscan noise.
These small habits dramatically reduce digital impression errors and remake risk.
Operator Training: The Fastest ROI in Digital Dentistry
A 2023–2025 review of intraoral scanning accuracy notes that operator skill, scanner calibration, and patient anatomy are intertwined determinants of success. That means disciplined training and repeatable SOPs immediately improve outcomes. PMC
High-yield training plan
- Vendor path mastery: practice with your team until it’s muscle memory.
- Lighting/Moisture drills: train assistants on setup so you start with a clean field.
- Bite capture simulation: bilateral MIP capture with quick on-screen validation.
- Self-audit culture: always run the 10-minute pre-send QA.
Lab Collaboration: Why It Matters (and How It Saves You Time)
Working with a digital-forward lab that supports both analog and fully digital workflows can prevent many intraoral scan errors from reaching the mill or printer. Associated Dental Lab leverages CAD/CAM, accepts major intraoral scan file formats, and uses secure client portals for fast case intake and messaging—reducing back-and-forth and allowing technicians to flag issues early.
Practical benefits you’ll feel
- Speed: instant file transfer; same-day design review in many cases.
- Accuracy: fewer distortions than shipping stone/PVS; predictable milling/printing.
- Support: expert guidance on complex and hybrid cases with low adjustment rates.
Put It All Together: A Zero-Remake, Zero-Guesswork Workflow
Before the scan
- Calibrate the scanner on schedule; check tip cleanliness.
- Plan your scanning strategy (IOS) based on tooth prep, edentulous spans, and patient factors.
- Control light and moisture; assemble retraction and suction.
During the scan
- Follow vendor path; move at a steady pace.
- Anchor to landmarks; add overlap on return passes.
- Avoid overscanning; delete and replace bad data instead of painting over it.
After the scan (the QA loop)
- Run the 10-minute pre-send checklist.
- Validate bite bilaterally; add a second buccal bite if anything looks off.
- Attach clinical notes/screenshots for the lab.
This workflow eliminates most intraoral scanner errors before they leave your operatory and dramatically reduces adjustment time and remakes once the case hits the lab.
Practical Examples (What You’ll See vs What It Means)
- Ghost cusps on #30 after rescanning
- Diagnosis: local mis-stitch from overscanning and poor overlap
- Fix: delete the area, dry, re-scan with clear occlusal landmarks on #29/#31
- Maxillary full-arch closes with a twist
- Diagnosis: macro-drift; return pass lacked cross-arch overlap
- Fix: re-scan in segments (post-ant-post) with deliberate cross-arch anchoring
- Unilateral occlusal contact in software, patient shows bilateral stops
- Diagnosis: bite registration scan error—buccal bite captured on one side only
- Fix: capture bilateral buccal bites with multiple cusp tips and re-validate
- Granular, frosted texture over a zirconia crown
- Diagnosis: reflectivity + overscan noise
- Fix: light matte spray per manufacturer guidance; one clean pass
- Disappearing finish line subgingivally
- Diagnosis: soft tissue interference; inadequate retraction
- Fix: additional retraction cord or retraction paste; dry and re-scan margin zone (document with screenshots for the lab)
Frequently Asked Questions
1) What are the most common intraoral scanner errors I should look for?
Watch for double anatomy, step-offs between tiles, grainy overscanned surfaces, incomplete margins, unilateral bite data, and global arch distortion—especially on full arches. These intraoral scan errors usually trace back to path deviations, moisture, or lighting.
2) How do I prevent scan stitching errors on full-arch cases?
Follow your scanner’s path, anchor to landmarks often, add cross-arch overlap on return passes, and avoid long, single-sweep routes. If the arch is feature-poor or the patient can’t cooperate, consider conventional impressions instead.
3) What causes a bite registration scan error, and how do I fix it?
Inadequate bilateral coverage, cheek interference, mandibular slide, and moisture can corrupt the buccal bite. Capture both sides with multiple cusp tips in MIP, dry the field, and validate contacts in software before sending.
4) Are intraoral scanning mistakes more about the operator or the patient?
Both. Evidence shows accuracy depends on operator skill and path discipline, scanner calibration, ambient light, and patient anatomy/movement. Train the team and control the environment to reduce variability. PMC
5) What’s the best way to handle rescanning mesh holes stitching without making things worse?
Delete the noisy patch, re-isolate, and re-scan with generous overlap anchored to stable landmarks. Stop as soon as a clean, continuous surface forms—don’t paint repeatedly. This keeps digital impression errors from compounding.
6) Which scanning strategy (IOS) is best?
The best strategy is the one your device was designed for. Most vendors recommend occlusal → lingual/palatal → buccal per arch, with intentional cross-arch overlap on returns. Deviating from the official path is a leading cause of intraoral scanner errors.
7) How can my lab help me avoid intraoral scan errors?
Choose a lab that supports fully digital workflows, quickly reviews incoming data, and provides feedback when something looks off. Associated Dental Lab accepts all major file types, uses secure portals, and offers proactive communication to reduce remakes and chair time.
About Associated Dental Lab
Associated Dental Lab is a dentist’s trusted full-service dental lab in Los Angeles, crafting fixed and removable restorations with modern CAD/CAM, premium materials, and integrated digital workflows. Dentists choose ADL for consistent turnaround, low adjustment rates, and expert guidance on complex and hybrid cases. If you’re ready to partner with a lab that treats your scans like the critical clinical data they are—and helps you prevent intraoral scan errors before they cost you time—contact Associated Dental Lab today.
Conclusion
You don’t need new hardware to improve accuracy—you need a sharper playbook. Understand how stitching works, control environment and path, verify with a disciplined pre-send QA, and collaborate with a digital-first lab. When you consistently spot and correct scan stitching errors before clicking “send,” you transform outcomes: fewer chairside adjustments, fewer remakes, faster delivery, and happier patients.
Work with a lab that matches your commitment to precision. Associated Dental Lab combines advanced technology with proven craftsmanship to turn clean data into predictable results—case after case. Contact us to become your practice’s trusted full-service dental lab partner.