Restoring teeth with subgingival margins forces a fork-in-the-road decision: move the tooth–tissue complex apically with crown lengthening, or shift the margin coronally with deep margin elevation. Both strategies can produce beautiful, durable outcomes—when you pick the right case and execute the right details. This lab-informed guide compares crown lengthening vs margin elevation step by step, integrates current evidence on biologic width (supracrestal tissue attachment) and ferrule effect requirements, and translates those findings into practical workflows your lab can support—whether you finish with an onlay vs crown after margin elevation or a full-coverage restoration following surgery.
The Core Question: Move Bone or Move the Margin?
At the highest level:
- Crown lengthening repositions gingiva and alveolar bone apically to create restorative space above the supracrestal tissue attachment (STA; formerly “biologic width”). It’s ideal when you need definitive access for margins and ferrule on a structurally compromised tooth. PEARL
- Deep margin elevation (DME), also called cervical/proximal box elevation, relocates a subgingival margin restoration to a supragingival position using bonded composite before you place an onlay, endocrown, or crown. It’s minimally invasive and can avoid sulcular/bony surgery—if the periodontal and biomechanical conditions are right. PMC
Biology First: Respecting the Supracrestal Tissue Attachment
What STA means for your margin
The 2017 periodontal classification replaced “biologic width” with supracrestal tissue attachment, the epithelial and connective tissue complex that seals the periodontium. Violation risks chronic inflammation and recession; in the esthetic zone, that can be devastating.
- Contemporary in-vivo work continues to quantify STA digitally, underscoring individual variability—another reason blanket “one-size” margin depths fail. AAP Journals
- When the planned finish line impinges on STA and isolation will be impossible, crown lengthening is often the biologically safer route. Conversely, where the margin is sulcular (not violating STA) and isolation is achievable, deep margin elevation is a conservative alternative.
Biomechanics: Ferrule and Restorability
A ferrule—a 360° band of sound tooth structure above the finish line—improves fracture resistance, especially in endodontically treated teeth. Systematic reviews and controlled studies repeatedly support a 1.5–2.0 mm ferrule as a rational target; when a full ferrule isn’t possible, partial ferrule still outperforms none. PubMed
Clinical translation
- If you cannot achieve ferrule without impinging the STA, consider crown lengthening (or orthodontic extrusion) rather than forcing a subgingival margin with no ferrule.
- If ferrule already exists (or the restoration is adhesive/partial coverage that doesn’t require full ferrule), deep margin elevation can restore isolation and operability with minimal tissue insult.
Deep Margin Elevation: What the Evidence Says
DME/CMR repositions a proximal cervical margin to a cleansable, visible area using layered composite, then proceeds with an indirect restoration. Recent literature and scoping reviews indicate that, when polished and finished properly, DME can be compatible with periodontal health and does not inherently worsen fatigue or fracture behavior of the final restoration. Material choice for elevation and luting influences marginal adaptation.
Open vs. closed sandwich background
DME evolved from the sandwich technique (placing GI/RMGI at the cervical margin beneath composite). Classic data suggest open sandwich (GI exposed to the oral cavity) may show less microleakage than closed sandwich in certain setups; modern DME tends to favor bonded composite elevation with careful finishing and a closed sandwich technique where indicated (e.g., a thin RMGI liner over dentin). Evidence remains mixed and material-dependent.
After margin elevation: onlay vs crown vs endocrown
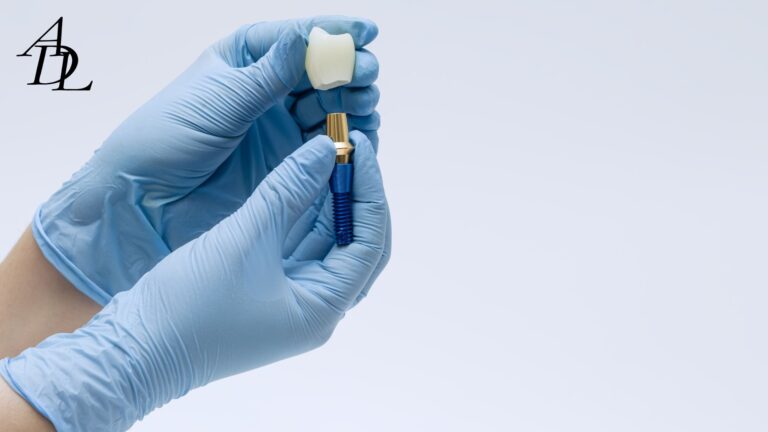
Emerging in-vitro data show endocrowns can outperform onlays in fracture resistance when combined with cervical margin relocation; case selection remains critical (pulpal status, adhesive substrate). Your lab can help evaluate remaining tooth structure and occlusion to suggest onlay vs crown after margin elevation (or endocrown) that preserves maximum enamel while meeting strength goals.
Crown Lengthening: Indications and Esthetic Considerations
Surgical crown lengthening remains the gold standard when subgingival caries or fractures violate STA and ferrule cannot be attained conservatively. Key points from contemporary reviews:
- Plan to re-establish sulcus and tissue stability before final restorations—many authors recommend ~3–4 months in esthetic areas for soft-tissue maturation before definitive impressions. Perio Clinic
- Individualize in the esthetic zone (tooth phenotype, papilla height, smile line) to prevent black triangles and recession.
- Combine with orthodontic extrusion when surgical apical repositioning would overexpose root or compromise crown–root ratio.
Isolation for Deep Margins: Do You Truly Have Control?
DME success hinges on isolation for deep margins—and your ability to finish/polish the new margin. Practical pearls:
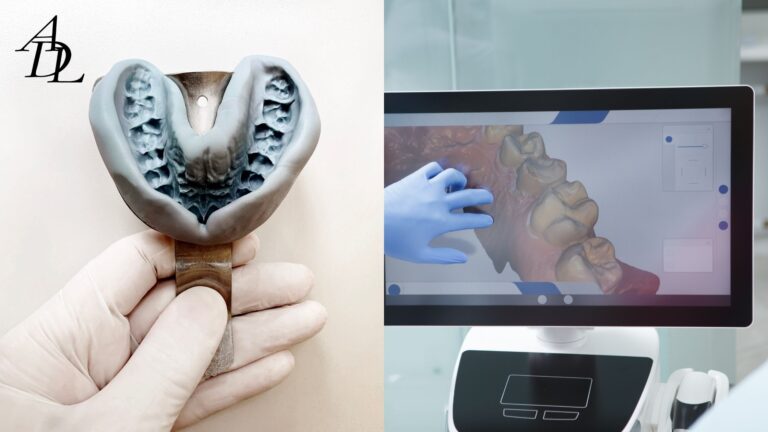
- Rubber dam with clamp on the tooth to be restored or on the neighbor; use teflon or PTFE to retract interproximally; in some cases, perform DME before IOS to enable accurate scanning under isolation. Case reports demonstrate combining DME and rubber dam prior to intraoral scans to improve visibility and moisture control.
- When dam isolation is impossible, consider dual-cord, hemostatic agents, or soft-tissue sculpting—but remember that inadequate isolation undermines bond reliability; at that point, surgery may be biologically and technically safer. Instructional resources reinforce systematic dam placement for efficiency.
Step-By-Step: Deep Margin Elevation (Lab-Aligned)
- Diagnosis & consent
- CBCT or PA to rule out vertical cracks; periodontal charting to estimate STA and sulcus depth.
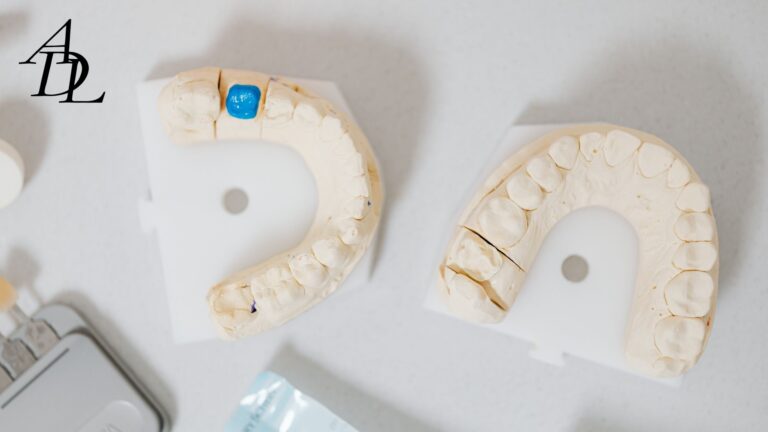
- Share with the lab: tooth, planned restoration (onlay/crown/endocrown), proposed margin path.
- Isolation & field prep
- Rubber dam with appropriate clamp; teflon to protect adjacent contact; matrix system with firm cervical seal (e.g., sectional matrix with wedge/teflon). Optimized isolation reduces contamination and supports adhesive longevity.
- Closed sandwich technique (selective)
- Where dentin is deep and sclerotic, consider a thin RMGI/liner for hydrophilic seal, then elevate with preheated nanohybrid or bulk-fill composite. Literature notes material and adhesive selection affect marginal outcomes; finish to a high polish.
- Margin relocation
- Elevate in 1–2 incremental layers to just above the gingival crest; contour emergence; cure thoroughly.
- Finish & polish
- Cervical finishing strips, rubber points, and a high-gloss system; a refined, smooth surface correlates with periodontal compatibility.
- Definitive restoration
- Bonded onlay or endocrown where possible; full crown when circumferential coverage and ferrule are required; coordinate with the lab for ceramic selection and margin design after DME. Evidence indicates endocrowns may exhibit favorable fracture resistance following CMR in endo-treated teeth.
Step-By-Step: Crown Lengthening (Restorative–Perio–Lab Continuum)
- Restorability assessment
- Determine required ferrule and finish-line position relative to STA; if you need 1.5–2.0 mm ferrule and will otherwise violate the attachment, plan crown lengthening.
- Surgical planning
- Periodontal phenotype, keratinized tissue, and smile line; mock-ups and periapicals to plan osseous recontouring and gingivectomy. Esthetic literature emphasizes individualized approaches for papilla and scallop stability.
- Provisionalization
- Use a well-polished provisional to guide tissue while healing.
- Healing & stabilization
- Allow ~3–4 months in esthetic areas before final margins and impressions; more in thick phenotypes or when extensive osseous recontouring was performed.
- Definitive prep & impression
- Position the new finish line supragingivally or equigingivally when possible; if subgingival, use precise retraction (dual-cord/expasyl/laser) and hemostasis. Evidence-based retraction protocols describe cord selection and two-cord techniques for predictable capture.
- Lab communication
- Provide photos of the new gingival architecture, emergence goals, and ferrule height so the lab can optimize margin design, ceramic thickness, and contour.
Crown Lengthening vs Margin Elevation: A Side-by-Side Decision Matrix
Choose deep margin elevation when:
- The margin is sulcular but not within STA; you can achieve rubber-dam isolation.
- There’s sufficient enamel for bonding or you can create a controlled adhesive substrate.
- You plan an adhesive restoration (onlay/endocrown) and ferrule isn’t mandatory.
- The patient prefers a non-surgical, minimally invasive approach and accepts that long-term studies are still growing compared to surgical literature.
Choose crown lengthening when:
- STA would be violated by your intended margin; isolation is unreliable.
- You require 1.5–2.0 mm ferrule for a full crown on an endo-treated tooth.
- The tooth is cariously or structurally compromised apically and adhesive elevation would result in an overly deep composite margin.
- The case is in the esthetic zone and tissue architecture needs to be harmonized at the gingival margin level.
Lab-Informed Material Choices After DME
- Adhesive ceramic onlay: maximal enamel preservation when cusps are strong; ensure elevated margin is smooth and easily scannable.
- Endocrown: favorable fracture resistance in endo-treated molars after cervical margin relocation; discuss ceramic and thickness with the lab.
- Full crown: choose when cuspal coverage, axial reduction, and ferrule are required for longevity; DME can still help expose a finish line for impressions if STA is respected.
- Cement & adhesive: select according to ceramic and substrate; communicate your adhesive strategy on the RX so the lab can prepare intaglio appropriately (e.g., HF + silane for lithium disilicate; air abrasion for zirconia).
Practical Chairside Examples
1) Deep distal box on #14, subgingival but sulcular
- Rubber dam isolation achievable; DME using preheated nanohybrid to relocate margin; bonded lithium-disilicate onlay. Periodontal literature supports DME compatibility with health when finishing/polishing is meticulous.
2) Fractured #9 with subcrestal crack and no ferrule
- Surgical crown lengthening to re-establish STA and gain 2 mm ferrule; provisional to sculpt tissue; final ceramic crown after 3–4 months.
3) Endo-treated #19 with broad MOD lesion, margin below CEJ
- DME to raise proximal cervical margin; endocrown selected (favorable fracture behavior after CMR).
Risks, Limitations, and How to Avoid Remakes
- DME without isolation → contamination, marginal gap, postoperative sensitivity. If you can’t dam it, don’t bond it; favor surgery.
- Crown lengthening in a high-smile esthetic zone → recession/black triangles; employ individualized planning and allow full soft-tissue maturation before definitive work.
- Inadequate ferrule on a full crown → catastrophic failure; consider orthodontic extrusion or surgical CL rather than forcing a deep subgingival crown margin.
- Rough elevated margins → plaque retention; studies link polished margins with healthy tissues after DME. Build in time to finish.
Cost, Time, and Patient Expectations
- DME: single restorative visit (plus indirect delivery) with minimal downtime; patients value non-surgical care but must understand that long-term data, while promising, are less extensive than surgical literature.
- Crown lengthening: surgical fee and healing window (often months in esthetic areas) before finalization; however, it can provide definitive access and long-term periodontal stability when STA is threatened.
Explain trade-offs simply: “If we can isolate and stay out of the attachment, we’ll elevate the margin and keep things conservative. If not, we’ll lengthen the crown to protect your gums and give the restoration a stronger foundation.”
How Associated Dental Lab Streamlines Either Path
- Flexible submissions: digital scans from major systems, downloadable RX, and clear implant/fixed/removable workflows.
- Local speed: same-day local service options and fast turnarounds help coordinate surgical-restorative timing.
- Case planning: technicians flag margin readability, propose onlay vs crown or endocrown options after DME, and help set emergence and occlusion targets that respect your biology-first plan.
Frequently Asked Questions (FAQ)
1) When should I choose crown lengthening vs margin elevation?
If the planned finish line will violate the supracrestal tissue attachment or you can’t reliably isolate, crown lengthening is safer. If the margin is sulcular and isolation is achievable, deep margin elevation conserves tissue and can work predictably with proper polishing and adhesive protocol.
2) How much ferrule do I need for a full crown?
Aim for 1.5–2.0 mm circumferential ferrule; partial ferrule is better than none. If you can’t achieve this without impinging on STA, plan surgery or orthodontic extrusion rather than forcing a deep subgingival margin.
3) Is deep margin elevation safe for the periodontium?
Yes—when margins are finished/polished and STA is respected, DME can be compatible with periodontal health; material choice and luting strategy influence marginal adaptation.
4) What about the closed sandwich technique during DME?
A thin GI/RMGI liner beneath composite may improve dentin sealing in deep areas, but outcomes are material-dependent; some studies favor “open sandwich” for microleakage, while contemporary DME more often uses bonded composite with meticulous finishing.
5) Which restoration is best after margin elevation—onlay vs crown?
Choose the least invasive design that meets strength goals. For endo-treated molars, endocrowns have shown favorable fracture resistance after cervical margin relocation; discuss case specifics with your lab.
6) How long should I wait after crown lengthening before final impressions in the esthetic zone?
Common guidance is ~3–4 months for soft-tissue stability before definitive work; phenotype and surgical extent may shift this timeline.
7) How does the lab help me decide?
Share probing depths, radiographs, photos, and your isolation plan. The lab can advise on material and design (e.g., endocrown vs onlay), evaluate ferrule on scans/photos, and flag unreadable margins early—saving remakes and appointments. Associated Dental Lab provides clear submission pathways (digital + pickup/shipping) to keep cases moving.
Conclusion
Great outcomes come from matching biology with biomechanics and then aligning the lab plan to both. Use crown lengthening when STA would be violated or ferrule is mandatory and cannot be achieved conservatively; build in healing time—especially in the esthetic zone—before definitive work. Choose deep margin elevation when you can isolate, finish to a high polish, and proceed with adhesive restorations that leverage remaining enamel while keeping tissues healthy. Communicate early and clearly with your lab about margin strategy, ferrule, and restoration design—so the ceramics, contours, and interfaces you receive are easy to seat and kind to tissues long term.
About Associated Dental Lab
Associated Dental Lab is a dentists’ trusted Full-Service Dental Lab in Los Angeles. Send digital or traditional cases via their Send a Case page, arrange local pickup or prepaid shipping, and collaborate with technicians who understand the nuances of crown lengthening vs margin elevation—from readable margins to material selection and emergence design. Partner with ADL to keep your surgical-restorative workflows on time and your outcomes predictable.