If you’ve restored even a handful of full-arch implants, you know the friction points: stitch errors with long scans, verification jigs that eat up time, and tiny misfits that become big occlusal headaches. Over the past few years, dental photogrammetry has shifted that narrative. By triangulating the 3D position of multiple implants from a burst of calibrated photographs, photogrammetry dental implants workflows give the lab a highly accurate, rigid “map” of the arch—often without models, jigs, or guesswork.
In a clinical world that’s increasingly digital, how your lab consumes and validates photogrammetry datasets is just as important as how you capture them chairside. Associated Dental Lab supports modern digital workflows—from receiving intraoral scans to CAD/CAM design—so practices can move quickly without sacrificing fit or esthetics. When your team can securely send scans and supporting records the same day, you shrink seat times and build patient confidence.
This guide blends on-the-ground tips with evidence-based highlights so you can decide when intraoral photogrammetry belongs in your armamentarium, how to compare photogrammetry vs intraoral scanning, and what labs need in order to deliver passive, repeatable results.
What Is Dental Photogrammetry and Why It Matters
Dental photogrammetry converts a set of calibrated photographs into a mathematically rigid coordinate system that defines the 3D position and angulation of multiple implants across an arch. Instead of relying on long-span IOS stitching to deduce the relative position of scan bodies, photogrammetry measures implant coordinates directly using coded targets/markers.
Core benefits
- Rigidity across distance: Multi-implant relationships are solved from camera geometry, not cumulative mesh stitching.
- Speed: Capture sequences take minutes; no cross-arch rescanning for “drift.”
- Model-free potential: Many labs design and mill directly from photogrammetry + soft-tissue scans, skipping stone models and even verification jigs in select protocols.
- Full-arch predictability: Especially useful where traditional scanning struggles—edentulous arches, shiny scan bodies, saliva, and limited access.
Several commercial systems exist; PIC dental photogrammetry is among the longest-running and widely studied, with published precision claims in the single-digit micron range and multiple validated formats for different clinical environments. picdental.com
Photogrammetry vs Intraoral Scanning: Complementary, Not Competing
It’s tempting to frame photogrammetry vs intraoral scanning as a replacement conversation. In reality, they’re complementary:
- Use photogrammetry to capture the exact 3D implant framework (positions/angulations) for full-arch or multi-unit cases.
- Use intraoral scanning to capture soft tissues, occlusion, and tooth morphology with rich color and surface detail.
Recent comparative research on full-arch rehabilitation shows that photogrammetry can outperform conventional techniques and long-span IOS for multi-implant positional accuracy, especially as arch length grows. Hybrid protocols that blend photogrammetry for implants and IOS for soft tissues consistently deliver the most reliable results across arches. PMC
Implant Scan Bodies vs Photogrammetry: When to Choose Each
Implant scan bodies vs photogrammetry boils down to span length and tolerance:
- Scan bodies (IOS alone)
- Excellent for single units and short spans with stable tissue.
- Faster for quadrant implant crowns where stitching error is minimal.
- Requires careful scan strategy and de-reflecting spray in shiny areas.
- Photogrammetry
- Best for full-arch implant photogrammetry cases or multiple implants where cumulative error can creep in.
- Reduces reliance on verification jigs and model casting in many workflows.
- Provides consistent base geometry that the lab can “lock” designs onto.
Industry offerings and lab protocols now make model-free/verification-free options feasible in many full-arch situations, provided your lab validates the dataset and fits to a known tolerance window.Integrity Dental Services
Photogrammetry Accuracy for Implants: What the Evidence Suggests
Peer-reviewed comparisons and technical reports converge on the same theme: when many implants are spread across an arch, photogrammetry provides highly accurate inter-implant relationships, often reducing adjustments and chair time at delivery. New intraoral scan-transfer approaches also show promise, but photogrammetry remains a consistent winner for cross-arch accuracy and passivity when executed correctly.
Vendors cite single-digit micron precision in controlled scenarios—important in theory but still dependent on user technique, target visibility, calibration, and lab validation. Clinically, what matters most is repeatable passivity: a framework that seats without strain and an occlusion that needs minimal refinement. System choice (e.g., PIC dental photogrammetry) influences workflow details, but the integration principles are broadly similar.
The Photogrammetry Workflow in Dentistry: Chairside to Lab
Chairside capture (intraoral photogrammetry)
- Plan: Confirm implant platforms, scan protocols, and file formats with your lab before surgery or impression day.
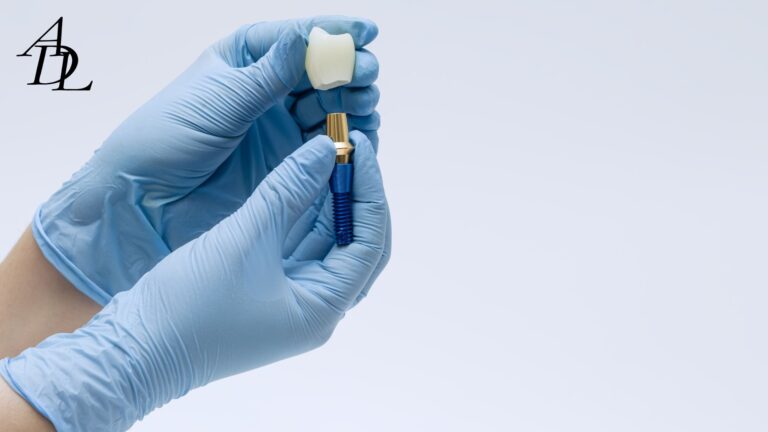
- Mount markers: Attach the photogrammetry targets/markers to multi-unit abutments/implants per the manufacturer.
- Calibrate & capture: Follow the camera’s prescribed path; ensure each tag is visible in multiple frames without motion blur.
- IOS complement: Perform a standard intraoral scan for soft tissue, occlusion records, and opposing dentition.
- Photographs: Take retracted shade and soft-tissue photos; capture smile dynamics if you plan an FP1 prosthesis.
- Package & submit: Name files clearly (e.g., Patient_Last_First_Arch_Date), include Rx, and upload through your lab’s digital intake or secure portal. Associated Dental Lab accepts digital impressions and supports CAD/CAM integration to move your case quickly.
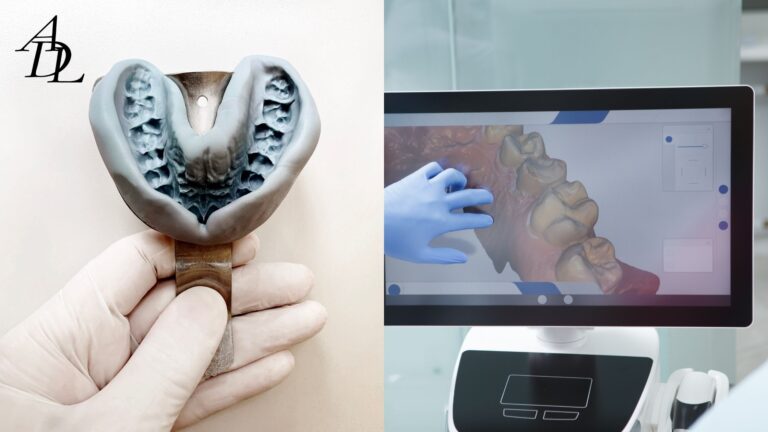
Lab integration (photogrammetry workflow dentistry)
- Data ingestion: The lab imports the photogrammetry dataset (implant coordinates) and merges it with IOS soft-tissue meshes.
- Validation gate: QC checks verify inter-implant distances and angles against expected ranges; suspect frames are re-triangulated or flagged.
- Prosthetic design: Using the rigid implant map, designers create FP1/FP2/FP3 provisionals or final frameworks, often model-free.
- CAM & finish: Mill/print, characterize, and finish; labs with robust digital lines can return designs quickly and reduce “surprise” chairside adjustments. Associated Dental Lab’s digital CAD/CAM pipelines are built for this style of rapid turn.
Full-Arch Implant Photogrammetry: Where It Really Shines
In edentulous or mostly edentulous arches, even excellent intraoral scanning can accumulate tiny errors; photogrammetry suppresses that drift by solving the arch as a rigid body. Clinically, that translates into:
- Passive frameworks that seat without prying or strain.
- Fewer verification steps (or none) in select protocols.
- Shorter delivery appointments because occlusion is “close out of the box.”
- Simpler remakes or revisions, since the implant map is retrievable and reproducible.
Labs across the industry now advertise coping-free, model-free full-arch options based on photogrammetry, underscoring the maturity of this pathway when teams align on capture and validation standards.
Photogrammetry vs Intraoral Scanning: A Quick Decision Guide
Choose photogrammetry first when…
- You’re restoring 4+ implants across an arch.
- The patient is edentulous/mostly edentulous and tissue landmarks are sparse.
- Past IOS attempts produced minor misfits or occlusal drift.
- You want to eliminate verification jigs and reduce appointments.
Choose IOS alone when…
- You’re restoring a single implant or short-span bridge.
- Tissue is stable, landmarks are plentiful, and you can scan quickly.
- You need rich color/texture data for esthetic ceramics without adding steps.
Blend both by capturing the implant map with intraoral photogrammetry and the soft tissue/occlusion with IOS. This “best-of-both” approach is now the default for many full-arch teams.
Lab Handoff: The Files and Details That Prevent Remakes
Send these with every full-arch photogrammetry case
- Photogrammetry file(s): native vendor export plus a neutral file (if supported).
- IOS meshes: upper/lower arches and buccal bite records.
- Records: shade photos (with tabs), midline/canine lines, smile images.
- Implant info: brand, platform, abutment type, torque history (if relevant).
- Prosthetic plan: FP1/FP2/FP3, material preferences (monolithic zirconia vs hybrid), and timeline.
Associated Dental Lab provides an online “Send a Case” workflow to schedule local pickup, print labels, or submit digital files—handy when your team wants the lab designing within hours, not days.
Quality Assurance: Turning Microns into Chairside Confidence
Accuracy matters, but repeatability + validation matter more:
- Set a tolerance gate (e.g., ≤50–75 μm cross-arch) for provisionals; tighter for finals.
- Use try-ins intelligently: a printed verification try-in or PMMA provisional confirms the map before committing to zirconia.
- Track seat times and adjustment minutes. If your seats average >30 minutes, revisit capture, calibration, and lab validation steps.
- Document deviations: note any hole enlargement or abutment strain—these are early signs your dataset or design needs refinement.
Academic and industry sources continue to show that photogrammetry is a reliable digital alternative for recording implant positions—particularly for long spans—when users follow a disciplined capture and validation protocol. ScienceDirect
Practical Case Snapshots
1) Immediate full-arch, four implants, limited keratinized tissue
- Approach: Intraoral photogrammetry for the implant map + IOS for soft tissue/bite.
- Outcome: Passive PMMA the same day; two-visit pathway to final zirconia with minor occlusal refinements.
- Why it worked: Rigid implant map avoided the drift that previously forced a verification jig.
2) Edentulous maxilla with divergent implants
- Approach: Photogrammetry + IOS with attention to palatal vault and hamular notches for better articulation.
- Outcome: Model-free monolithic zirconia with excellent passivity; delivery under 30 minutes.
- Pearl: Include extra-oral smile photos; gingival design and incisal edge position were dialed in the CAD preview.
3) Hybrid rescue after repeated remakes
- Approach: Switch from scan-bodies-only to full-arch implant photogrammetry; re-establish the implant coordinate system; print a verification try-in.
- Outcome: Definitive hybrid seated without strain; minimal screw torque variance across sites—an indirect passivity indicator.
Implementation Roadmap: Bringing Photogrammetry to Your Team
- Pick a system and playbook. Evaluate PIC dental photogrammetry and other systems; look at training, support, and export formats your lab prefers. picdental.com
- Calibrate the team. Capture is technique-sensitive—practice on models, then staff members, then simple clinical cases.
- Align with your lab. Confirm naming conventions, export settings, and how they’ll validate the dataset before milling. Associated Dental Lab’s digital integration streamlines this handoff.
- Start with provisionals. Use PMMA to confirm the map before jumping to zirconia.
- Measure success. Track seat time, screw torque variance, and adjustment minutes.
- Iterate. Tune lighting, retraction, and camera angles; small improvements pay off at delivery.
Security and Logistics: Getting Data There Fast (and Safely)
Photogrammetry projects often include large native files plus scans and photos. Use your lab’s secure digital intake to transmit datasets quickly and keep cases moving. Associated Dental Lab’s online submission flow makes it easy to schedule pickup, print labels, or upload digital impressions—so design can start the same day. Associated Dental Lab
How Associated Dental Lab Integrates Photogrammetry in Real Workflows
- Digital-first intake: We accept intraoral scans and digital records and design with CAD/CAM to compress turnaround while maintaining precision.
- Full-arch expertise: Our team merges photogrammetry implant maps with soft-tissue scans to deliver passive frameworks and esthetic outcomes without unnecessary verification steps—when case conditions allow.
- Fewer remakes, faster seats: Digital planning and rapid design previews shrink back-and-forth and improve first-seat rates. Practices routinely see faster turnarounds when pairing digital submissions with clear prescriptions.
Frequently Asked Questions (FAQ)
1) What makes dental photogrammetry different from intraoral scanning?
Dental photogrammetry captures the 3D implant coordinate system directly from calibrated photos, while IOS captures soft tissues and teeth as polygon meshes. For long spans, photogrammetry reduces cumulative stitch error; IOS complements it with rich surface detail.
2) Is photogrammetry always more accurate than scan bodies?
Not always for single units or short spans, but for photogrammetry dental implants across an arch, multiple studies show superior cross-arch accuracy and passivity versus long-span IOS alone or conventional impressions.
3) Do I still need a verification jig with full-arch implant photogrammetry?
Often not. Many labs now run model-free, jig-free pathways when the dataset passes validation and a printed try-in confirms fit. Your lab’s protocol and your case specifics (tissue, access, divergence) determine the final steps.
4) Which systems are used in clinical practice?
Vendors include PIC dental photogrammetry and others. Compare capture ergonomics, export formats, training, and support. Ask your lab which outputs they prefer to streamline integration.
5) How do I blend photogrammetry with IOS?
Capture the implant map with intraoral photogrammetry, then scan soft tissue, opposing, and bite with IOS. Your lab merges the datasets and designs provisionals/finals from the combined record—this is the most dependable full-arch pathway today. PMC
6) What about data size and turnaround?
Use your lab’s secure upload to transmit native photogrammetry files plus scans and photos. With digital intake and CAD/CAM design, labs can begin work quickly and shorten overall timelines.
7) Can Associated Dental Lab handle my photogrammetry cases?
Associated Dental Lab is built around digital integration—accepting intraoral scans and supporting CAD/CAM workflows for efficient handoffs and predictable results. Contact us to discuss file formats, validation steps, and scheduling.
Conclusion
For long-span and full-arch prosthetics, dental photogrammetry isn’t a fad—it’s a practical way to reduce variables and give your lab the rigid, accurate implant map it needs. When you pair that map with an intraoral scan of soft tissue and occlusion, you get a hybrid dataset that seats quickly and wears well. Whether you use PIC dental photogrammetry or another platform, the differentiator is integration: a disciplined capture routine, a lab that validates the dataset, and a shared protocol for try-ins and finals.
About Associated Dental Lab
As a Dentists’ trusted Full-Service Dental Lab, Associated Dental Lab supports digital case submission, accepts major intraoral scan formats, and leverages CAD/CAM to deliver precise, esthetic restorations on schedule. If you’re ready to integrate photogrammetry dental implants into your everyday workflow—or simply want a lab fluent in both photogrammetry and IOS—reach out. We’ll help you build a repeatable, efficient pathway from capture to delivery, one full-arch at a time.