Over the last decade, the debate of digital impressions vs traditional impressions has moved from “if” to “when.” Most practices now own (or plan to buy) an intraoral scanner, yet every week presents cases where the analog gold standard—polyvinyl siloxane (PVS)—still wins. Making smart choices between intraoral scanning vs PVS saves chair time, reduces remakes, and keeps patients happy.
As a full-service partner to restorative clinicians, Associated Dental Lab works across both workflows daily: from digital dental impressions (STL/PLY/OBJ) to impeccably captured PVS impressions. We support modern digital integration while still optimizing analog excellence—fast turnarounds, collaborative communication, and same-day local repair options in Los Angeles when timing is tight.
This guide gives you a clear, clinical playbook—rooted in lab experience—for deciding when to scan and when to PVS, with concrete examples, prep and retraction tips, and ways to boost digital impression accuracy and analog predictability.
The Big Question: Digital Impressions vs Traditional Impressions
Think of digital impressions vs traditional impressions as complementary tools, not rivals. Scanners thrive when you can control light, moisture, and line-of-sight to a well-defined finish line; PVS shines when you need to capture soft-tissue detail in challenging environments (especially deep margins) or when a long-span framework demands seamless cross-arch accuracy and tissue border molding.
Quick Rule-of-Thumb
- Scan when you have clear supragingival or equigingival margins, good moisture control, short spans, and cooperative fields.
- PVS when you face deep subgingival margin impression needs, bleeding, mobile tissue, or when you require compressive capture of movable mucosa.
Intraoral Scanning vs PVS: Strengths at a Glance
When Scanning Shines
- Single-unit and short-span fixed cases (e.g., single crowns, 3-unit bridges)
- Inlays/onlays/veneers with visible margins and enamel-heavy preps
- Quadrant implants with scan bodies and stable tissue contours
- Bite records where digital articulation reduces interarch errors
- Provisional and mock-up workflows, chairside design previews
- Patient communication (on-screen education and shade/shape discussion)
When PVS is a Safer Bet
- Deep subgingival margins where retraction and moisture challenge scanners
- Hemorrhagic fields or saliva you cannot fully control
- Full-arch complex cases that include edentulous spans and need border molding
- Removable frameworks (RPD major connectors, altered cast, flanges)
- Immediate denture records where functional depth must be impressed
- When significant tooth mobility or diastemas can confuse stitch algorithms
Core Indications: Intraoral Scanner Indications vs PVS Impression Indications
Intraoral Scanner Indications (Use a Digital First Strategy)
- Single posterior crown with equigingival margin and good isolation.
- Lithium disilicate or zirconia partial coverage (onlay/inlay/veneer) with visible finish lines.
- Short-span bridge (≤3 units) with parallelism and clear margins.
- Quadrant implant crown with a verified scan body and stable soft tissue.
- Nightguards/occlusal appliances from digital models when the bite is cleanly recorded.
- Opposing arch and bite to refine occlusion quickly in the lab.
Why: You’ll capitalize on digital impression accuracy in short spans, reduce retakes, and accelerate seat times.
PVS Impression Indications (Analog First for Predictability)
- Subgingival margin impression where cords, paste, or laser troughing still leave fluid.
- Full-arch digital impression not feasible due to limited scanner access, saliva, or patient tolerance.
- Long-span bridges where cross-arch verification and soft-tissue compression help.
- Complex RPD frameworks that benefit from border molding and anatomic capture under pressure.
- Complete/Immediate dentures when functional periphery and vestibular depth are critical.
- Severely rotated or mobile teeth that cause stitching errors and geometric drift on scan.
Why: PVS’s hydrophilicity, tear strength, and tissue displacement provide reliable capture when visibility and stability are compromised.
Digital Impression Accuracy: Getting It Right the First Time
Prep Design & Margin Management
- Aim supragingival when possible. If you must go subgingival, create a broad, readable chamfer/shoulder.
- Two-cord technique (00 + 0/1) with hemostatic agent improves margin revelation even if you plan to scan.
- Finish line refinement with a fine-grit bur increases scan readability and reduces data noise.
Moisture & Field Control
- Isolate with cotton rolls, parotid pads, and a dedicated suction assistant.
- Hemostasis first, scan second. Ferric sulfate/aluminum chloride + pressure > beautiful scan lines.
- Dry, shine, scan. Remove puddles; scanners read geometry, not water.
Scan Strategy
- Follow the manufacturer’s path (occlusal → palatal/lingual → buccal) to reduce stitching errors.
- Keep tip distance and angle consistent. Avoid waving; think “paint a surface.”
- Capture a little beyond the margin 360°; incomplete cervical data is the #1 remake trigger.
- Check in-software for holes; patch immediately before you dismiss the patient.
Bite Registration Digitally
- Minimal interferences on the scan improves virtual articulation.
- Check for tripodization—contacts in anterior/posterior both sides—to keep the lab’s occlusal map honest.
PVS Excellence: Analog Moves that Still Matter
Material Selection
- Heavy + light body (dual-viscosity) for fixed; putty + wash for tough fields.
- Fast set for gaggers; regular set for complex detail.
- Tray choice: dual-arch for single posterior when accurate, custom tray for long spans/full arch.
Retraction & Hemostasis
- Two-cord protocol: Pack the larger cord first, smaller on top; remove the top cord at inject to open the sulcus.
- Hemostatic gels with suction and microbrush agitation; rinse thoroughly to avoid bond inhibition.
- Keep the tip in the sulcus; express against the margin and pull through to prevent bubbles.
Tray Seating & Removal
- Uniform pressure; no rocking. Seat in one motion from posterior to anterior.
- Time it. Do not remove early; PVS rebound can distort marginal fidelity.
- Inspect immediately: look for pulls, tray show-through, drags, or voids at the finish line.
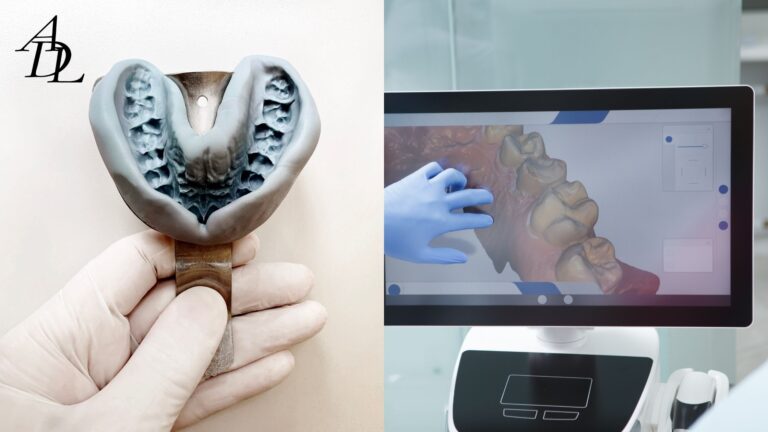
Full-Arch Digital Impression vs Full-Arch PVS: What Works Best?
Full-Arch Digital Impression: When It Works
- Stable occlusion and limited edentulous spans.
- Patient tolerance allows complete scan without excessive motion or saliva.
- You can scan in segments and use a protocol (stitch checks and “island” rescans) to maintain accuracy.
- You will 3D print a verification model for the lab when the case is mission-critical (e.g., long-span splinted prosthetics).
Pro Tip: For complex full-arch fixed cases, consider a “hybrid” approach: digital scan + PVS verification jig or printed try-in to eliminate cross-arch error before final.
Full-Arch PVS: When It’s Safer
- Immediate/complete dentures requiring border molding and recorded functional peripheries.
- Combination cases (fixed + removable) where mucosal support must be captured in compression.
- Multiple pontics/long spans where stitch error risk is high and tissue detail matters more than digital speed.
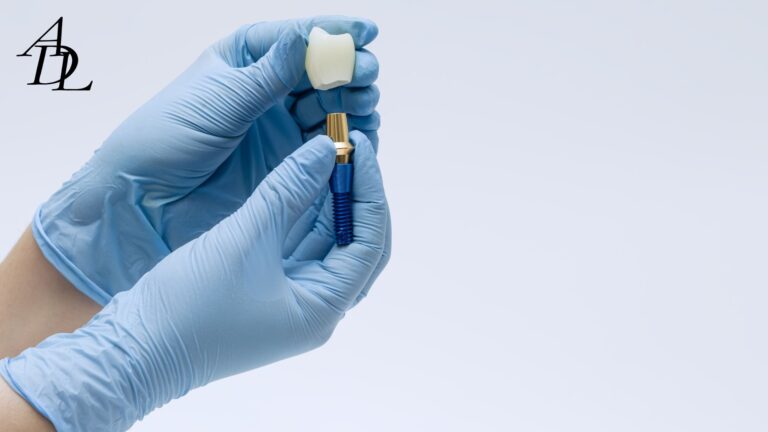
Implants: Scanning vs PVS for Restorative Accuracy
Scan with Confidence
- Single implant crowns with a validated scan body library.
- Adequate tissue stability and visible emergence profile.
- Photograph the scan body in place for extra verification.
Consider PVS (or a Hybrid)
- Multiple implants splinted across an arch: use scan + verification jig, or PVS open-tray pick-ups.
- Limited interarch space or soft-tissue undercuts that confuse scan geometry.
- Immediate placements with inflamed tissue—wait or use PVS after tissue maturation.
Subgingival Margin Impression: Managing the Hardest Lines
Whether you choose intraoral scanning vs PVS, subgingival margins demand a plan:
- Biologic width respect. Don’t chase margins where biology won’t allow dryness.
- Two-cord + hemostasis for exposure; micro-laser or electrosurgery can help revise tissue.
- Scan quickly once dry; or inject light body decisively with PVS when sulcus is open.
- If in doubt, take both. A quick analog backup takes minutes and saves remakes.
Communication with the Lab: The Hidden Remake Killer
Great outcomes often hinge on what you tell your lab. Associated Dental Lab emphasizes doctor-centered collaboration, direct technician calls for unclear instructions, and proactive clarification before proceeding—simple habits that elevate the case success rate and cut redos.
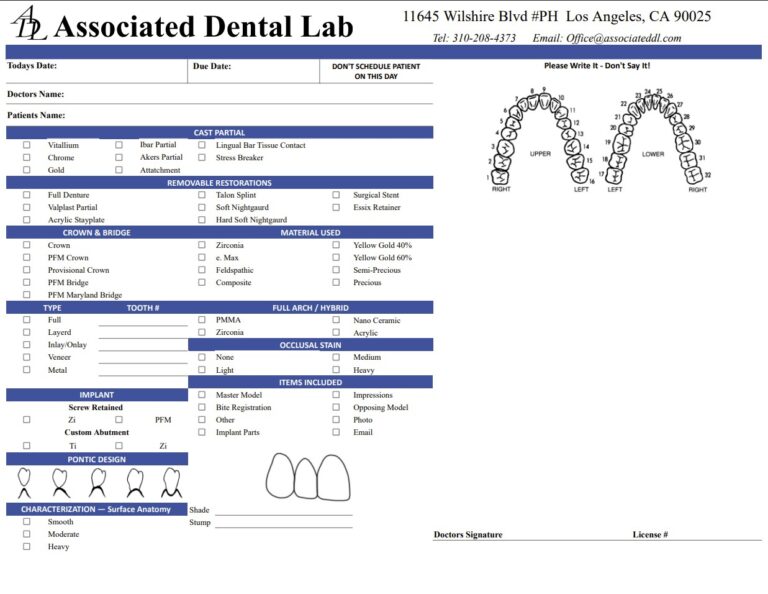
Send Your Best Data
- Photos (dry, retracted, with shade tab)
- Prep map (finish line, special instructions)
- Scanner brand & file type (STL/PLY/OBJ)
- Material request (e.max vs zirconia, etc.)
- Turnaround expectations and delivery date
Why it matters: It streamlines the lab’s design choices, reduces questions, and shortens your dental restoration turnaround time. Associated Dental Lab’s typical standard turnaround is 3–5 in-lab days, with rush options available when scheduled.
Time, Money, and Satisfaction: Picking the Right Modality
When Scanning Saves the Day
- Chair time drops (no tray selection/mixing/set/wrap/ship).
- Provisional fit improves using digitally guided prep reduction and occlusion.
- Try-in predictability goes up with digital design previews.
- Patients love it—no gag, quick capture, and cool tech.
When PVS Protects Your Outcome
- Hemostatic uncertainty: analog light-body “paints” what scanners cannot see through blood/saliva.
- Tissue dynamics: border-molding relines and functional peripheries are still analog best-in-class.
- Risk management: a heavy-body/putty backup avoids reschedules if scanning fails.
Real-World Examples: When We Scan, When We PVS
Case 1: Single Lower Molar Crown, Healthy Tissue
- Choice: Scan
- Why: Equigingival margin, saliva controlled.
- Outcome: Spot-on fit, one-visit seat.
Case 2: Upper Lateral Veneer with Slight Subgingival Margin
- Choice: Scan + meticulous retraction; PVS backup if bleeding persists.
- Why: Aesthetic zone; need high-fidelity line.
- Outcome: Digital success after excellent hemostasis; no backup required.
Case 3: 4-Unit Anterior Bridge with Deep Margins and Tissue Overgrowth
- Choice: PVS (dual-viscosity) + retraction and minor tissue recontouring.
- Why: Subgingival detail, cross-unit continuity.
- Outcome: Accurate margins, minimal adjustment.
Case 4: Single Implant Posterior
- Choice: Scan with library scan body
- Why: Stable soft tissue, straightforward emergence.
- Outcome: Clean emergence profile; tissue-level emergence matched to provisional.
Case 5: Immediate Complete Denture
- Choice: PVS custom tray, border molding, functional final + digital duplicate for records
- Why: Functional peripheries essential; intraoral scanning not ideal.
- Outcome: Predictable suction and phonetics.
Building a Hybrid Workflow That Wins More Often
The smartest teams blend the modalities:
- Scan first for prep, opposing, and bite.
- Clip a PVS “insurance” impression if access or bleeding worries you.
- Use a verification step (printed model or jig) for long spans or multiple implants.
- Photograph the prep and shade (and scan body for implants).
- Document retraction technique on the lab slip; it signals margin confidence.
This approach leverages digital dental impressions for speed while retaining PVS for those few clinical variables you can’t fully control.
How Associated Dental Lab Supports Both Pathways
- Digital integration: We accept all major intraoral scanner files (STL/PLY/OBJ) and design through CAD/CAM for consistent precision.
- Analog mastery: We craft fixed and removable restorations from high-quality PVS records every day.
- Turnarounds that match your schedule: Standard 3–5 in-lab working days; rush services available by pre-arrangement.
- Local speed when you need it: Same-day local repairs/relines for practices across West LA neighborhoods when received before the cut-off—keeping patients on track.
- Materials you trust: Zirconia, titanium, Valplast, Lucitone, and certified alloys, paired with hand-finished artistry.
Frequently Asked Questions (FAQ)
1) What’s the simplest way to decide digital impressions vs traditional impressions?
If margins are visible and the field is dry, scan. If margins are subgingival, bleeding, or you need functional border molding, take PVS. Short spans favor digital; complex full arches and tissue-driven records favor analog.
2) How accurate are intraoral scanners for full-arch digital impression cases?
Full-arch digital impression accuracy has improved, but success depends on scanner technique, segmentation, saliva control, and verification. For long-span splinted restorations, add a verification jig or analog cross-check.
3) What are the top intraoral scanner indications?
Single units, short bridges, inlays/onlays/veneers with readable margins, and quadrant implants with scan bodies are ideal intraoral scanner indications. Patients appreciate comfort and speed.
4) When are PVS impression indications strongest?
PVS is favored for subgingival margin impression, hemorrhagic fields, full dentures with border molding, long-span frameworks, and when you need compressive capture of soft tissue.
5) Do digital dental impressions reduce remakes?
Yes—when prep design, retraction, moisture control, and scan path are optimized. Many remakes come from hidden/poorly defined margins rather than the scanner itself.
6) Can I mix workflows—scan plus PVS?
Absolutely. Scan for speed and visualization, but take a quick PVS “safety” impression if margins or tissue look questionable. Hybrid workflows protect the schedule.
7) How fast can a lab turn these cases around?
Associated Dental Lab’s standard turnaround is 3–5 in-lab days with rush options; local practices can access same-day repairs/relines for select appliances—handy when timing matters.
Conclusion
Choosing between intraoral scanning vs PVS is less about technology brand loyalty and more about clinical judgment. Use scanning to capitalize on speed, data richness, and patient experience when margins are visible and fields are dry. Use PVS when biology calls the shots—subgingival margin impression challenges, functional borders, or complex cross-arch stability.
With the right decision tree—and a lab partner fluent in both worlds—you’ll reduce adjustments, prevent remakes, and elevate outcomes. Associated Dental Lab has been “crafting smiles since 1962,” supporting both digital dental impressions and PVS with collaborative case planning, modern CAD/CAM, and reliable turnarounds from our Los Angeles facility. We’re here to make every impression—digital or traditional—count.
About Associated Dental Lab
As a dentists’ trusted Full-Service Dental Lab, we combine advanced digital integration with master-level analog techniques to deliver consistent, beautiful results across fixed and removable prosthetics. Need help choosing digital impressions vs traditional impressions on your next case? Want guidance on intraoral scanning vs PVS for full-arch or implant workflows? Reach out—our team is ready to collaborate, offer practical tips, and keep your schedule moving. Associated Dental Lab
Call or send a case today to see how much smoother your days can be.