Few phone calls rattle a schedule like a patient reporting post cementation sensitivity the morning after a crown seat. Sometimes it’s a fleeting zing to cold; other times it’s throbbing on chewing, or “it feels high.” The differential is broad—pulpal irritation from provisional trauma, resin cement irritation, microleakage at open margins crown, or uncalibrated occlusion. The good news: most cases resolve quickly when the clinical team uses a disciplined, stepwise protocol—before cementing and again if crown sensitivity after cementation appears. Recent clinical studies and reviews highlight that cement type, tooth preparation, surface cleaning, occlusion, and radiographic verification all influence postoperative outcomes. A weekly habit of following a prevention-first checklist will lower callbacks, chairside adjustments, and redos. Dr. Alan Atlas
Below is a comprehensive, practical guide you can print and keep at the op. It organizes prevention and troubleshooting into a single postoperative sensitivity dentistry workflow you can teach to any assistant and align with your lab.
Why Teeth Hurt After Crown Delivery
The common pathways to sensitivity
- Fluid shifts in exposed dentin from microleakage or incomplete sealing during cementation (hydrodynamic theory). PubMed
- High occlusion or excursive interferences causing periodontal ligament and pulpal stress. NCBI
- Chemical or thermal triggers from provisional or adhesive steps; some cements and primers irritate dentin when isolation is incomplete.
- Contaminated intaglio (e.g., saliva on zirconia) impairing bond quality, allowing microleakage and sensitivity. 3M Multimedia
- Structural problems—cracks or incomplete seating leading to flexure and discomfort on bite. American Association of Endodontists
Understanding these vectors frames your decision tree: seal tubules, ensure passive fit, verify contacts/occlusion, pick the right cement, and execute meticulous cement cleanup so the margin cures hard—without a sticky, bacteria-loving oxygen-inhibition layer.
Prevention First: A Chairside Checklist Before You Open Cement
Try-In Verification (Dry)
- Seat to depth and probe margins circumferentially with an explorer. No rock. If seating is uncertain, do not mark occlusion yet. Consider a quick bitewing as an adjunct, with the understanding that radiographs can miss misfits and must be paired with tactile checks.
- Proximal contacts: Floss must “snap” without shredding; adjust the restoration (not adjacent teeth) if tight.
- Occlusion pre-check: Thin paper to map MIP dots, then confirm with shimstock “holds.” Don’t evaluate excursions until you’re sure it’s fully seated; an unseated crown is the #1 source of phantom high spots. NCBI
Surface Clean & Prime (Material-Specific)
- Zirconia: If the intaglio contacted saliva during try-in, clean with 5% NaOCl or a dedicated cleaner; do not use phosphoric acid before bonding. Sandblast per IFU when indicated. Improper cleaning reduces bond strength and invites microleakage that can present as post cementation sensitivity.
- Glass-ceramics (e.g., lithium disilicate): Respect etch/clean/primer timing; any shortcut increases permeability and sensitivity risk.
Pulpal Calming: Desensitizer (When Indicated)
- On vital teeth with broad dentin exposure, a desensitizer for crowns (e.g., glutaraldehyde-based) can reduce fluid flow without hurting retention; evidence suggests no adverse effect on crown retention with common cements. Use HEMA-free or low-HEMA options if you are concerned about trans-dentin cytotoxicity. ScienceDirect
Cement Selection & Isolation
- Choose cement by substrate, retention form, and moisture control. Some randomized and comparative clinical studies have shown different sensitivity profiles between resin-modified glass ionomer and self-adhesive resin cements; adhesive protocols demand reliable isolation and meticulous technique.
Cementation & Cement Cleanup
- Seat with firm pressure; for resin cements, tack-cure briefly to create a peelable gel. Remove gross excess interproximally and around the finish line. Paint glycerin gel at margins before final cure to eliminate the oxygen-inhibition layer and achieve a harder, polishable surface. This reduces plaque retention and decreases sensitivity from marginal resin smear. Institute of Digital Dentistry
Final Occlusion & Baseline
- After curing and flossing, re-mark MIP and excursions. Polish any adjustments. Capture a baseline bitewing when indicated; radiographs are an adjunct, not a substitute, for explorer-verified margins. American College of Prosthodontists
Troubleshooting Guide: If Patients Report Crown Sensitivity After Cementation
Think of this as a four-minute triage that sorts “normal transient” from “needs an adjustment today.”
Step 1 — Classify the Symptom
- Cold/air sensitivity lasting seconds: likely hydrodynamic changes or marginal permeability; monitor with desensitizing toothpaste and a short check visit.
- Sharp pain on biting/release: suspect a high spot or crack; evaluate occlusion in MIP and excursions with thin paper and shimstock. Occlusal high spots can create periodontal ligament strain and crack propagation.
- Lingering, throbbing pain or thermal pain lasting minutes: consider pulpal inflammation (deep prep, provisional trauma, adhesive penetration) and rule out open margins crown. Pair explorer checks with adjunctive radiographs.
- Soreness interproximally: look for resin tags left during cleanup; floss with a knot and inspect.
Step 2 — Occlusion First, Always
- Seat the crown fully (dry field) and re-verify MIP with thin paper; confirm shimstock “hold” only on intended contacts; then check excursions. Remove sharp, point contacts and polish. Literature on occlusal trauma underscores that even a “minor” high spot after recent treatment can trigger pain.
Step 3 — Margin Integrity & Cement Residue
- Explore 360°. If you detect a catch or a “click” at the finish line, consider marginal overhang or gap. Take a bitewing as an adjunct, recognizing the limitations of radiographs in detecting some margin misfits.
- If interproximal soreness persists, anesthetize if necessary and gently remove residual gelled resin with scalers/strips; re-floss with a knot. Incomplete cement cleanup is a frequent, fixable culprit.
Step 4 — Seal the Dentin (if indicated)
- For persistent cold sensitivity with intact occlusion and verified margins, consider retraction, cleaning, and applying a glutaraldehyde-based desensitizer along the exposed dentin/cement line, then reseal as appropriate per cement type. Evidence supports glutaraldehyde’s tubule-sealing effect; choose formulations mindful of HEMA content.
Step 5 — Substrate-Specific Re-Cement (when necessary)
- If you suspect bond compromise (e.g., contaminated zirconia intaglio), remove the crown, clean the tooth and intaglio properly, and re-cement with the correct protocol. For zirconia that touched saliva, clean with NaOCl or approved cleaner, avoid phosphoric acid, and follow the primer/adhesive instructions.
Step 6 — Suspect Cracks When Bite Pain Persists
- If pain on release persists after occlusal adjustment and margin cleanup, evaluate for cracks with transillumination, bite tests, and—when appropriate—endodontic consultation. Cracked-tooth literature emphasizes occlusal prematurities and heavy function as risk factors.
Clinical Decision Tree (Quick Reference)
- Pain with chewing? → Check occlusion (MIP then excursions) → adjust/polish; reassess.
- Cold sensitivity only? → Verify margins; consider desensitizer; reinforce home desensitizing toothpaste.
- Spontaneous, lingering pain? → Rule out pulpal involvement, deep margins, or open contact/margins; radiograph adjunct; consider temporary recementation with sedative liner if indicated.
- Interproximal soreness? → Remove residual resin; re-floss; smooth and polish.
- Implant crown? → Pain is rarely “pulp”—focus on occlusion, screw stability, and peri-implant tissue.
Material & Technique Pearls That Lower Sensitivity Risk
Choose cements with intent
- Self-adhesive resin cements may offer lower reported sensitivity than some alternatives in short-term studies, but they still require clean, dry, properly prepared substrates. Understand your cement’s moisture tolerance and follow the IFU exactly.
Respect dentin biology
- Over-drying can collapse collagen, impair hybridization, and create nanoleakage. Moist (not wet) dentin principles still apply with many adhesives—sloppy isolation increases the chance of post cementation sensitivity.
Lock in a hard margin
- For resin cements, glycerin gel over margins before final cure closes the oxygen-inhibition layer and produces a harder, less permeable surface—smoother for the tongue and kinder to gingiva.
Clean zirconia the right way
- After try-in contamination, NaOCl (≈5%) or a dedicated zirconia cleaner improves subsequent bond strength; avoid phosphoric acid on zirconia before bonding. Sandblast as indicated.
Use desensitizers judiciously
- Glutaraldehyde-based desensitizers reduce fluid flow and have not been shown to compromise crown retention with common cements; consider HEMA-free formulations where possible to minimize trans-dentin cytotoxicity.
Communication With Your Lab: Reducing Sensitivity at the Source
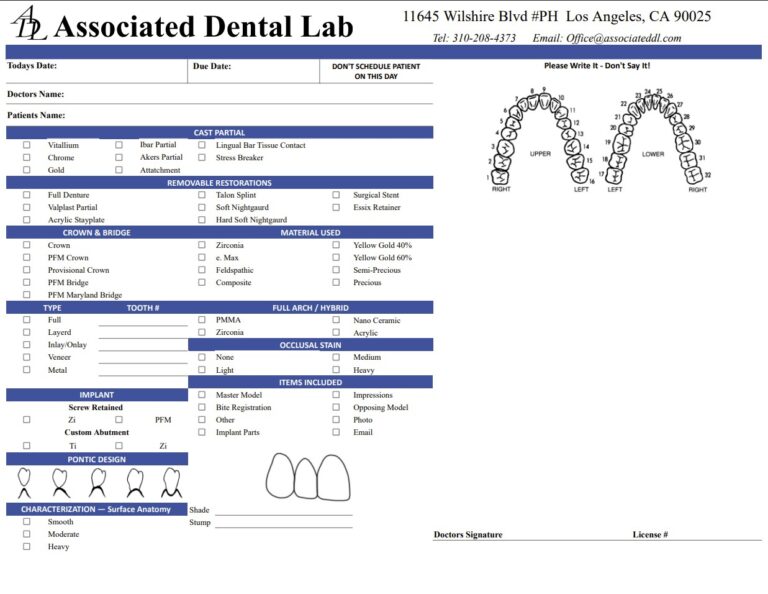
What to include on the Rx
- Finish-line photos (retracted, dried), stump shade, reduction photos, bite records, and clear material/cement preferences.
- If the patient has a history of sensitivity, request polished margins and confirm emergence pressure is gentle.
KPIs that matter
- Track call-backs for post cementation sensitivity, return visits for occlusion, and remakes linked to fit. A weekly snapshot with your lab will reveal patterns (e.g., “tight distal contacts on upper molars”) you can fix upstream.
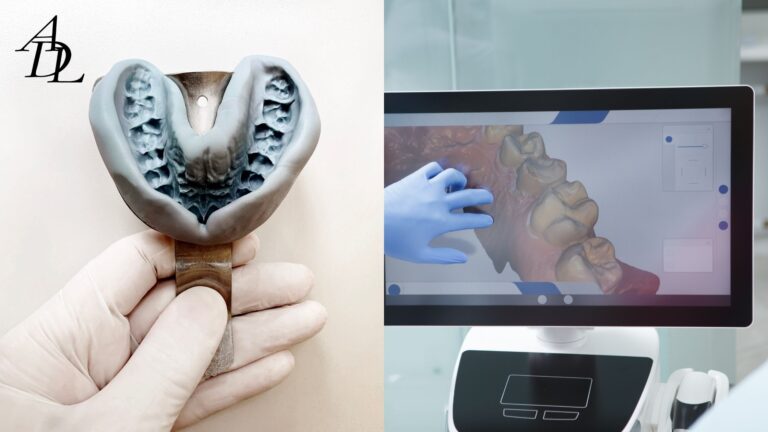
Associated Dental Lab (Los Angeles) supports “seat-day” checklists with consistent contacts and emergence, accepts digital scans (DS Core, DEXIS, iTero, Medit, TRIOS), and offers local pickup and prepaid shipping—useful when you want fewer surprises and faster, cleaner seats.
Patient Guidance: Setting Expectations and Self-Care
- Normal vs not: Mild temperature twinges for a few days can be normal; worsening pain or pain on chewing needs a quick check.
- Home care: Desensitizing toothpaste (potassium nitrate), avoid very hot/cold foods briefly, and consider a nightguard if bruxism is present. These steps are widely recommended adjuncts while the tooth calms. Sensodyne
Case Vignettes (How the Checklist Works)
Case 1: Cold Zings, Day 2
A posterior zirconia crown seats perfectly; patient reports brief cold sensitivity. Explorer finds smooth margins; radiograph used as adjunct looks fine. Apply glutaraldehyde-based desensitizer for crowns at the margin during a short visit; reinforce home desensitizing toothpaste. Symptoms resolve in 72 hours.
Case 2: Pain on Bite, “Feels Tall”
Next-day call: “hurts when I chew.” MIP shows heavy dots; shimstock holds only on the crown. Adjust MIP, then excursions; polish. Pain resolves immediately—classic occlusal high spots.
Case 3: Lingering Thermal Pain
Persistent thermal pain and tenderness to percussion. Re-evaluate: a subtle marginal discrepancy is detected; adjunctive radiograph raises suspicion. Crown is removed, zirconia intaglio found contaminated; cleaned with NaOCl, tooth resealed, and crown re-cemented with correct protocol. Sensitivity resolves.
Frequently Asked Questions (FAQ)
1) How long can post cementation sensitivity last?
Most mild cases resolve within days to a couple of weeks as the pulp recovers and fluid shifts stabilize. If pain worsens or lingers, reassess occlusion and margins, and consider material-specific bonding issues.
2) What are the most common triggers of crown sensitivity after cementation?
High occlusion, marginal leakage or resin residue, contaminated substrates (e.g., zirconia not cleaned after try-in), and pulpal irritation from provisional/adhesive steps.
3) Do desensitizers affect crown retention?
Glutaraldehyde-based agents used on prepared dentin have not shown detrimental effects on retention with common cements; they can reduce sensitivity by sealing tubules. Consider HEMA-free options to reduce cytotoxic risk.
4) How do I prevent resin “tackiness” at the margin?
Perform meticulous cement cleanup, then place glycerin gel over margins before final cure to block the oxygen-inhibition layer; this yields a harder, smoother surface that’s kinder to gingiva.
5) Are radiographs enough to rule out open margins crown?
No. Use them as adjuncts only. Combine explorer palpation, visual inspection, and occlusal verification. Digital radiographs can both miss misfits and over-call acceptable margins, depending on material and angulation.
6) Which cement causes less postoperative sensitivity dentistry?
It depends on isolation, substrate, and technique. Some trials report lower sensitivity with self-adhesive resin cements compared with certain alternatives, but no cement overcomes poor cleaning or moisture control.
7) What if pain on biting persists after adjustment?
Evaluate for cracks or parafunctional overload and consider endodontic consultation. Cracked-tooth guidance points to occlusal prematurities and heavy function as common cofactors.
Conclusion
Sensitivity after a crown seat is not a mystery—it’s a systems problem you can solve. Prevent it by verifying full seating, calibrating contacts and occlusion, cleaning and priming substrates correctly, applying a thoughtful desensitizer for crowns when indicated, and executing disciplined cement cleanup with a hard, fully cured margin. When post cementation sensitivity does appear, a rapid triage—occlusion, margins, residue, substrate, then cracks—will get most patients comfortable the same day. Pair this checklist with a cooperative lab and you’ll see fewer callbacks, quicker seats, and happier patients.
About Associated Dental Lab
Associated Dental Lab is a dentists’ trusted Full-Service Dental Lab in Los Angeles. ADL fabricates crowns, bridges, implants, and removables; accepts digital scans (DS Core, DEXIS, iTero, Medit, TRIOS); and provides local pickup and prepaid shipping. Their technicians partner with your team to minimize adjustments, support best-practice cementation protocols, and reduce crown sensitivity after cementation through precise contacts, emergence, and margins. If you want fewer post-op calls and smoother seat days, contact Associated Dental Lab and send your next case.