The fastest crown seat is the one you barely notice. When a restoration drops to depth, contacts “snap,” occlusion marks are predictable, and cleanup takes seconds—not minutes—you feel it. The difference isn’t luck or brand of cement; it’s a disciplined crown seating checklist applied the same way every time. By front-loading verification (fit, contacts, occlusion, cement selection, and isolation) before you open cement, a well-built pre-seat checklist dental protocol routinely trims 20–30% off seat-day time while reducing post-op calls and remakes.
This guide distills a step-by-step pre-cementation checklist you can print, laminate, and use chairside. It also includes a try-in protocol crown bridge, contact/occlusion check sequence, cement cleanup tips, and seat-day workflow you can teach to any assistant. The goal: fewer surprises, cleaner margins, and a predictable bite—every time.
The Why: Chair Time Leaks You Can Eliminate
Time killers you already know
- “It won’t seat.” (Hidden debris, tissue overgrowth, cement ledges on the intaglio, distorted temp contacts.)
- “Contacts are too tight/too light.” (Unverified model contacts, distorted provisionals, inaccurate floss tensioning.)
- “Bite is off.” (Adjusting before full seating, no shimstock verification, wrong paper sequence.)
- “Cement cleanup is a mess.” (Wrong cement for the case, no tack-cure strategy, no glycerin gel barrier for resins.) 3M Multimedia
The fix: a pre-seat checklist that front-loads success
When you standardize how you try-in, verify, and cement, the team acts in sync—like a pit crew. You’ll see tighter variance in seat times, better radiographic baselines, and fewer unplanned adjustments at recall. (Radiographs are adjunctive—use them to document and, when indicated, to help detect issues—but they do not replace clinical fit checks.) eCommons
Your Core Crown Seating Checklist (Print This)
Stage A — Before Try-In (at the tray):
- Confirm restoration ID, tooth, material, shade, and margin type.
- Review Rx notes and lab communication.
- Pre-select cement based on substrate and retention needs (e.g., conventional vs. adhesive for zirconia/lithium disilicate per manufacturer guidance). Glidewell
- Isolate tools: floss, articulating papers (thin and thick), shimstock, explorer, scaler, microbrushes, retraction cords/hemostatic (if needed), cotton rolls, bite tab.
- Have cleanup protocol ready: scaler/curette, floss for interproximals, microbrushes, glycerin gel for resin cement oxygen-inhibition control, and light guide. GC
Stage B — Dry Try-In (no cement):
6) Seat to depth with finger pressure; verify margins circumferentially with explorer; confirm no rock.
7) Proximal contacts: snap floss through; the ideal is “firm snap, not shredding,” with 1 film of shimstock optionally used as a micro-gauge when needed. Adjust restoration (not the adjacent teeth) if heavy. Spear Education
8) Occlusion (provisional removed): confirm the restoration fully seats before marking; use thin paper for initial dots, then shimstock to confirm “hold” in MIP; mark excursions only after MIP is stable.
9) Radiographic adjunct (when indicated): bitewing/periapical to evaluate seating/baseline; interpret radiographs as adjunctive, not definitive of marginal integrity.
Stage C — Surface Clean & Prep:
10) Clean the intaglio: remove saliva/try-in paste; for sandblasted zirconia, clean with NaOCl (≈5%) or an approved cleaner; avoid phosphoric acid on zirconia. For lithium disilicate, follow etch/clean/prime instructions post try-in.
11) Prep the tooth: pumice, rinse, and isolate; control moisture.
Stage D — Cementation & Cleanup:
12) Load cement per IFU; seat with firm pressure; stabilize.
13) Tack-cure (for resins) as directed to create peelable gel; immediately remove gross excess from margins and interproximals. Apply glycerin gel over margins before final cure to block the oxygen-inhibition layer, improving surface hardness.
14) Final light cure per IFU; floss all contacts; confirm margins again with explorer.
Stage E — Post-Seat Verification:
15) Contact/occlusion check (sequence below) and polish.
16) Radiographic baseline when indicated. dentevita.com
17) Post-op instructions and recall plan.
The Try-In Protocol (Crown & Bridge)
Step 1: Remove the provisional and debride
Clean temporary cement remnants, pumice the prep, and rinse. Anything left behind can lift the crown off-seat by 50–150 microns—enough to distort occlusion and margins.
Step 2: Dry try-in to full depth
Use explorer circumferentially. If you feel a “speed bump,” identify if it’s internal binding (adjust crown intaglio) or soft tissue interference (pack a brief cord or manage tissue, then retry). For implant prostheses, collapsed tissue around abutments can also block seating—reshape tissue or re-place provisional as needed, then re-try. ITI
Step 3: Proximal contact calibration
- Floss test: Snap floss through. Heavy resistance indicates adjustment; if floss shreds, it’s too tight. No resistance means open contact—pause and confer with your lab.
- Strip/feeler check (optional): Some clinicians prefer ultra-thin diamond strips/feeler tools for objective clearance verification and micro-relief.
Step 4: Occlusal pre-check (with restoration fully seated)
- Stabilize crown with light finger pressure; ask the patient to close gently.
- Mark with thin paper first; confirm “hold” with shimstock (≈8–13 μm)—it should drag slightly on your target holding contacts. Only then test excursions.
Step 5: Decide cement strategy
- Consider retention/resistance form, substrate, isolation, and esthetics. Follow a “material-first” matrix (e.g., monolithic zirconia often works with conventional or self-adhesive cements; glass-ceramics generally require adhesive protocols).
Bite Adjustment Sequence (The Order That Saves Time)
1) Seat & stabilize first
Do not mark occlusion until the restoration is unquestionably to depth—occlusion on a partially seated crown is wasted motion.
2) Centric stops (MIP) before excursions
- Thin paper to locate dots; you’re looking for light, broad contacts similar to adjacent teeth.
- Confirm with shimstock “holds” on intended contacts.
3) Excursive pathways next
- Check laterotrusive and protrusive with thicker paper/ribbon to visualize streaks.
- Adjust steep, point-contact interferences to shallow, polished pathways. Rinse and re-mark until smooth.
4) Polish the adjustments
A glossy surface decreases plaque retention and “high-spot” recurrence.
5) Re-check with floss
Ensure adjustments did not warp contacts.
Contact/Occlusion Check: Fast Tools, Right Order
- Floss to verify “snap” and remove interproximal excess.
- Thin articulating paper (e.g., 20–40 μm) for initial MIP mapping.
- Shimstock (≈8–13 μm) for micro-assessment of “hold” vs “no hold.”
- Thick ribbon (e.g., 100–200 μm) for excursive streaks after MIP is correct.
- Explorer to confirm margin integrity after cleanup.
Cement Cleanup Tips (That Actually Work)
Universal habits
- Stabilize while cleaning. Support the crown to prevent micro-lift during early gel removal.
- Work circumferentially. Peel away gelled resin from easy to hard angles; floss out interproximal tags immediately.
Resin cements (adhesive/self-adhesive)
- Tack-cure briefly (per IFU) to achieve a peelable consistency. Remove gross excess, apply glycerin gel to margins, final cure, then rinse off gel. This minimizes oxygen-inhibition and leaves a harder, less “tacky” surface at the margin.
Conventional cements
- Allow initial set and “roll” excess away at the gel point; interproximal threads can be teased out with knotted floss.
Surface decontamination pearls
- For zirconia contaminated by saliva at try-in: clean with NaOCl (≈5%) or a zirconia cleaner; avoid phosphoric acid before cementation.
- For lithium disilicate: follow HF-etch/clean/prime timing precisely (chairside vs lab-milled protocols differ).
Seat-Day Workflow (Team Script You Can Train)
Assistant (Prep-Set):
- Lay out verification tools and cements; review IFUs; set up suction, cotton rolls, retraction cords if needed, and light tip.
- Call out the case (tooth, material, shade) and confirm cement plan with doctor.
Doctor (Verification Loop):
- Remove provisional and debride.
- Dry try-in; explorer margin check; manage tissue if needed.
- Floss contacts; micro-relief if tight.
- Thin paper → shimstock → excursions.
- Radiograph adjunct when indicated; approve to cement.
Assistant (Cement Loop):
6) Prepare tooth (pumice/isolate).
7) Prepare restoration surface per material (clean/prime/adhesive as required).
8) Load cement; pass; maintain dry field.
Doctor (Seat & Finish):
9) Seat with firm pressure; remove gross excess.
10) Tack-cure (resin) → peel excess → glycerin gel → final cure → rinse.
11) Floss all contacts; explorer margins.
12) Final contact/occlusion check and polish.
13) Baseline radiograph when indicated; post-op instructions.
Practical Examples (Where the Checklist Pays Off)
Example 1: Tight distal contact that prevents full seating
Without checklist: You adjust occlusion on a crown that isn’t fully seated, then chase high spots endlessly.
With checklist: Floss fails to snap → micro-relief the crown’s contact → crown drops to depth → occlusion marks become predictable; cleanup is quick. (Objective floss tensioning and/or thin strip use reduces guessing.)
Example 2: Saliva-contaminated zirconia after try-in
Without checklist: You cement; crown de-bonds months later.
With checklist: You clean with NaOCl/approved cleaner, avoid phosphoric acid, and proceed per IFU. Bond strength is preserved.
Example 3: Resin margins feel “tacky” after cure
Without checklist: You leave an oxygen-inhibited smear that stains later.
With checklist: Apply glycerin gel before final cure, then rinse; the margin is hard, glossy, and easier to polish. GC+1
Advanced Notes: Bridges and Multi-Unit Cases
Try-in protocol crown bridge (multi-unit)
- Verify each unit’s seating individually when possible; then together as a segment.
- Check passivity (no rock) as a group; use sectioning strategy for rigid splints when necessary.
- Calibrate contacts sequentially from the most “anchored” abutment forward.
Bite strategy for long spans
- Stabilize one quadrant at a time; mark MIP with thin paper, confirm with shimstock “holds,” then map excursions.
- Expect to polish more pathways—long spans amplify small interferences.
Training & Measurement (So It Sticks)
- Time your seats for a month before and after adopting the checklist.
- Audit five cases/week for: (1) number of occlusal adjustments, (2) margin cleanup time, (3) post-op sensitivity calls.
- Refine: If a specific step repeatedly adds time (e.g., contact relief), adjust lab communication (request lighter contact ranges) and in-office tools (e.g., add a standardized strip).
Frequently Asked Questions (FAQ)
1) What belongs on a crown seating checklist?
Verification tools (floss, thin/thick paper, shimstock), explorer, scaler, isolation aids, cement(s) with IFUs, and a step order: dry try-in → contacts → occlusion → surface clean → cement and controlled cleanup → post-seat checks. This is the essence of a reliable pre-seat checklist dental workflow.
2) Do I really need shimstock if I already use articulating paper?
Shimstock (≈8–13 μm) doesn’t mark, but it reveals whether a contact “holds” in MIP. It’s the quickest micro-check to confirm you’re adjusting the right spot, not creating new high points.
3) When should I take a radiograph during seating?
Use radiographs as an adjunct—for example, when clinical evaluation raises seating concerns, and/or to capture a baseline after cementation for future comparison. They don’t replace explorer-based margin checks.
4) What’s the best pre-cementation checklist for zirconia vs. glass-ceramics?
Follow a material-first matrix: zirconia often permits conventional/self-adhesive cements (after proper cleaning); glass-ceramics typically need adhesive protocols with correct etch/prime steps.
5) Any cement cleanup tips for resin cements?
Yes—brief tack-cure to a peelable gel, remove gross excess, paint glycerin gel over margins, then final cure and rinse. You’ll get cleaner margins and less surface inhibition.
6) How tight should contacts feel at try-in?
Aim for a “firm snap” with floss; heavy shredding means too tight, while no resistance risks food impaction. Adjust contacts on the restoration, not adjacent teeth.
7) What’s the most time-saving step in the seat-day workflow?
Front-loading the try-in: verify full seating, calibrate contacts with floss/shimstock, and map MIP before excursions. Most post-seat headaches trace back to shortcuts here.
Conclusion
A faster seat isn’t about rushing—it’s about removing roulette from the process. The crown seating checklist above transforms a dozen tiny decisions into a single, repeatable pre-seat checklist dental habit: seat to depth, prove contacts, lock in MIP, then cement with a cleanup plan. Add a smart bite sequence and a few material-specific pearls (zirconia cleaning, lithium disilicate pretreatment, glycerin gel for resins), and you’ll see measurable drops in chair time, cleaner radiographs, and happier patients.
About Associated Dental Lab
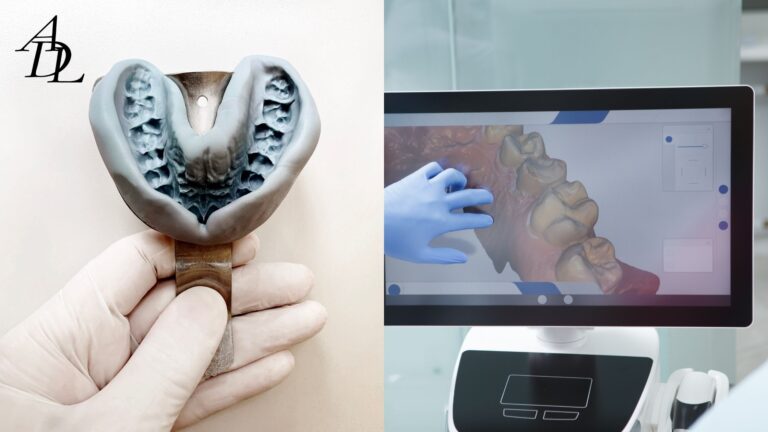
Associated Dental Lab is a dentists’ trusted Full-Service Dental Lab in Los Angeles, delivering crowns, bridges, implants, dentures, and guards with technician-to-doctor communication, local pickup, prepaid shipping labels, and digital scan intake (DS Core, DEXIS, iTero, Medit, TRIOS). If you want a lab that supports your seat-day workflow—from contact targets to occlusal mapping—send a case to Associated Dental Lab.