If you’ve ever delivered a beautiful implant restoration that later “lets go” at the titanium interface or returns with a loose screw, you know the heartbreak: everything looked perfect on day one. In most cases, the culprit isn’t your occlusion or the ceramic—it’s the micro-mechanics at the ti-base abutment interface and the steps used to bond a hybrid abutment crown. Tiny decisions—how tall the ti-base is, whether the walls are truly engaged, which primer is used, how you air-abrade—compound into either years of reliable service or early failure.
This deeply practical guide unpacks what matters most: ti-base height retention, wall taper and surface energy, the correct ti-base bonding protocol, how and when to use MDP primer zirconia to titanium, choosing the right resin cement for ti-base, safe sandblasting parameters ti-base, and evidence-driven screw loosening prevention. You’ll also find chairside and lab checklists, failure analyses, and real-world examples that reduce remakes and keep your torque wrenches in the drawer.
The Vocabulary: What We Mean by Ti-Base and Hybrid Abutment Crown
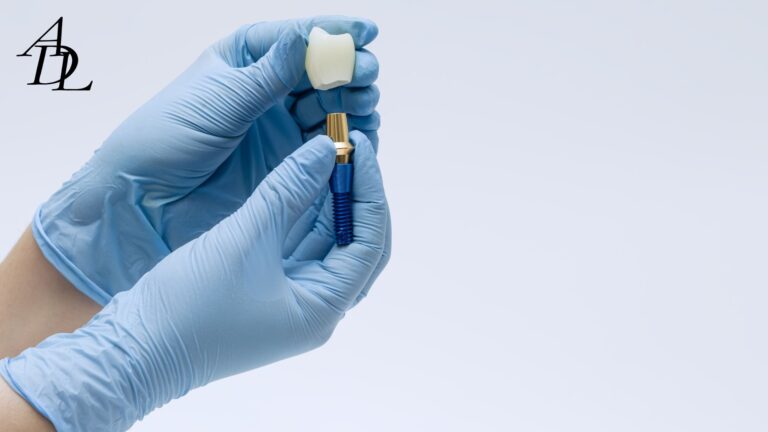
Ti-base abutment (titanium base)
A prefabricated titanium insert that engages the implant connection internally. Coronally it presents a short cylindrical or slightly tapered wall (often with anti-rotational features or grooves) that’s designed to be bonded to a ceramic component—most commonly zirconia or lithium-disilicate.
Hybrid abutment crown
A single, screw-retained restoration in which a ceramic “sleeve” (or full crown form) is extraorally bonded to the ti-base abutment with adhesive resin. The unit is then seated and torqued. Compared with traditional two-piece (custom abutment + cement-retained crown), the hybrid abutment crown minimizes subgingival cement risks and simplifies maintenance.
Why Height and Wall Engagement Matter More Than You Think
Retention is geometry × surface × chemistry
- Geometry: Taller walls increase bonding surface and anti-rotation. A 1–2 mm increase in ti-base height can dramatically raise resistance to tensile and shear forces.
- Surface: Air-abraded, clean titanium increases micromechanical retention for adhesive resins.
- Chemistry: Proper primers and resin cements create durable bonds to both titanium and ceramics.
Practical targets for ti-base height retention
- Ideal wall height: 4–6 mm is robust for most single units. Many systems offer ti-bases in ~3–6 mm; select the tallest that fits your limited interocclusal space and emergence profile.
- Minimum engagement: ~3 mm can work in low-load zones with impeccable bonding, but plan for risk-mitigation (occlusal scheme, screw-retightening, nightguard if bruxism).
- Taper: Less taper = more frictional retention. Many ti-bases have minimal taper; avoid over-milling the ceramic that would “relax” the fit.
When height is limited
- Choose a taller ti-base variant if available (tissue-level vs bone-level options differ).
- Add retentive macro-features in the ceramic (manufacturer-provided design libraries).
- Favor high-bond ceramics (zirconia or LDS) with correct primers and a high-strength resin cement for ti-base.
- Consider a two-piece solution (separate abutment + crown) if engagement is critically short.
Materials and Interfaces: Which Ceramic, Which Primer, Which Cement?
Zirconia on ti-base abutment
- Surface prep (zirconia): Air abrasion (see parameters below) + MDP primer zirconia to titanium (MDP-containing primer or universal with MDP).
- Why MDP matters: The phosphate monomer (10-MDP) forms a strong chemical bond to zirconia’s metal-oxide surface and has affinity for titanium oxides as well.
- Cement: Dual-cure adhesive resin cement for ti-base (no eugenol; radiopaque preferred). “Self-adhesive” cements are not a substitute for proper primers here.
Lithium disilicate on ti-base abutment
- Surface prep (LDS): HF etch per IFU (commonly ~20 seconds for many materials), thorough rinse, dry, silane application.
- Ti-base side: Air abrasion + metal primer (or universal containing MDP).
- Cement: Dual-cure adhesive resin cement.
- Note: LDS can be more technique-sensitive for long-term load at this interface—ensure adequate wall height and bonding.
Which side gets which chemistry?
- Zirconia: MDP on the zirconia side; MDP-containing metal primer (or universal) on the titanium side.
- LDS: Silane on the LDS; MDP-containing metal primer (or universal) on the titanium.
Sandblasting Parameters Ti-Base and Ceramic (Without Hurting Anything)
Always follow the specific IFU of the ti-base and ceramic system you’re using. That said, the following ranges are widely used in lab and clinical protocols:
- Ti-base abutment: 50 μm Al₂O₃ at ~1.0–2.0 bar (15–30 psi), ~10 mm standoff, 5–10 seconds, moving. Avoid aggressive blasting that rounds anti-rotational features. Ultrasonically clean or steam clean afterward; avoid touching the prepped surface.
- Zirconia sleeve: 50 μm Al₂O₃ at ~1.0–2.0 bar, 10–15 seconds, moving pass; clean; apply MDP primer.
- Lithium disilicate: No sandblasting on the intaglio (unless IFU says otherwise). HF etch + rinse + silane is the correct pathway.
Pro-move: Warm-air dry after primer applications to volatilize solvents and improve monomer coupling before cementation.
The Ti-Base Bonding Protocol (Step-by-Step)
- Try-in & verify fit
- Dry-fit the zirconia/LDS onto the ti-base abutment. Confirm full seating, no “rock.”
- Check screw-access path, especially if using an angulated channel.
- Surface preparation
- Ti-base: Air-abrade per parameters; clean; dry; apply a metal primer or universal containing MDP. Air-thin.
- Ceramic:
- Zirconia → air-abrade → apply MDP primer → air-thin.
- Lithium disilicate → HF etch → rinse → dry → silane → air-thin.
- Cement selection
- Dual-cure resin cement for ti-base with high bond strength to metal and ceramics; radiopacity is helpful for verification imaging. Avoid eugenol-containing provisional cements pre-bond.
- Lute extraorally
- Fill the ceramic with cement, seat onto the primed ti-base while rotating slightly to avoid hydraulic entrapment.
- Maintain pressure and remove excess immediately around the interface with microbrushes and explorer.
- Tack cure briefly to gel the margins; clean fully; then complete a full cure per IFU from multiple angles.
- Finish & polish
- Smooth any marginal flash at the ceramic–titanium junction to prevent plaque retention and soft-tissue irritation.
- Screw assembly & torque
- Seat the hybrid abutment crown; finger-tighten; check seating radiographically when indicated.
- Torque to the manufacturer’s value (commonly 25–35 N·cm; follow the implant system IFU).
- Screw loosening prevention: re-torque after 5–10 minutes to compensate for embedment relaxation.
- Access seal
- PTFE tape in the channel; cover with composite. Avoid trapping voids; maintain retrievability.
Design Decisions that Drive Retention (Before You Ever Bond)
Wall engagement (CAD)
- Keep the ceramic sleeve’s intaglio as parallel as possible to the ti-base abutment walls. Over-relieving reduces frictional resistance.
- Use manufacturer libraries that include the exact ti-base geometry—don’t “freehand” the intaglio.
Margin placement and emergence
- Leave a small “shoulder” of ceramic past the titanium junction for cleansability and ferrule-like stability.
- Respect tissue contours; avoid bulky emergence that concentrates lateral load at the interface.
Thickness & material selection
- Zirconia ≥ 0.8–1.0 mm around the interface resists chipping; LDS thickness should respect material IFUs for strength.
- Consider monolithic zirconia in high-load posterior zones; LDS is excellent when esthetics are paramount and loads are moderate.
Failure Modes: What Breaks (and Why)
Loss of bond at the interface
- Root causes: Insufficient wall height, poor air-abrasion, contaminated primer, wrong cement type, moisture contamination, or expired chemistry.
- Fixes: Increase ti-base height, switch to MDP-containing bonding for zirconia, re-establish clean surfaces, choose a high-strength adhesive cement.
Screw loosening
- Root causes: Inadequate preload, lack of re-torque, contaminated threads, heavy excursive contacts, or patient parafunction.
- Prevention: Clean and dry threads; use manufacturer screws (coated where indicated); torque, wait, re-torque; adjust occlusion; consider nightguard for bruxers.
Ceramic fracture around the access
- Root causes: Thin ceramic around the screw channel, angulated channel with sharp internal angles, or heavy occlusal contacts nearby.
- Prevention: Maintain adequate thickness, add internal fillets, move contacts away from the access where feasible.
Rotation/micro-movement on the ti-base
- Root causes: Under-engaged anti-rotational features, short walls, or over-relieved intaglio.
- Prevention: Honor ti-base geometry in CAD; choose taller walls; ensure crisp anti-rotation capture in the ceramic.
Screw Loosening Prevention: A Mini-Playbook
- Cleanliness: Alcohol wipe threads/screw; air-dry.
- Torque discipline: Use a calibrated driver at manufacturer’s value; re-torque after 5–10 minutes.
- Occlusion: Load in MIP with shallow slopes; eliminate or lighten excursive contacts on implant crowns.
- Component quality: Prefer OEM or high-grade aftermarket screws with proven coatings (e.g., TiN) for stable preload.
- Occlusal guards: Provide for bruxers and full-arch load sharers.
Case Selection: When a Hybrid Abutment Crown Shines—and When It Doesn’t
Great indications
- Single posterior units with adequate interocclusal space for 4–6 mm of ti-base height retention.
- Esthetic-zone singles where subgingival cement is undesirable.
- Sites with straightforward screw access (or validated angulated channels).
Caution or alternative
- Extremely limited space (<3 mm wall) and high bite forces → consider custom abutment + crown.
- Severe angulation that forces a thin screw-access “tube” in ceramics → consider a custom solution or different restorative pathway.
- Poor hygiene access or uncontrolled parafunction → delay until risks are managed.
Chairside Checklist (Print This)
Before bonding
- Verify ti-base SKU/height matches CAD library
- Confirm dry try-in seats fully, no rock
- Prepare: Ti-base air-abraded + metal/MDP primer; zirconia air-abraded + MDP or LDS etched + silane
- Have dual-cure resin cement for ti-base ready (check expiry)
Bonding
- Extraoral lute; remove excess; full cure from multiple angles
- Smooth margins; avoid ledges
Delivery
- Torque to spec; wait; re-torque
- Adjust occlusion (light centric, minimal excursive)
- Seal access with PTFE + composite
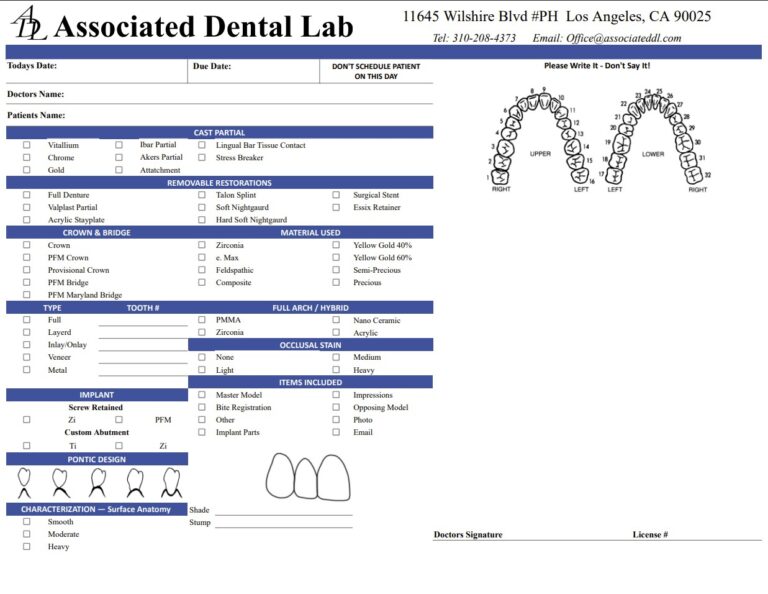
Lab Communication: What Your Technician Needs to Nail It
- Implant system, platform, connection (and driver type)
- Ti-base brand and height desired; platform-specific notes (tissue- vs bone-level)
- Screw-access strategy (straight vs angulated)
- Material request (zirconia shade/translucency or LDS)
- Preferred bonding kit (so the lab can pre-treat intaglio where appropriate)
- Any screw loosening prevention request (e.g., request coated screw)
- Due date & whether you want a bonded unit returned ready-to-seat or ceramic sleeve separate from the ti-base abutment for you to bond
Associated Dental Lab can build to either workflow: they can return a pre-bonded hybrid abutment crown or send the components prepared for your chairside bonding, depending on your preference and local regulations.
Real-World Examples
Example 1: Short walls, great bonding—still failed
A posterior unit with a 2.5 mm wall debonded at 6 months. The team had ideal chemistry but heavy excursive contacts. Solution: taller ti-base at remake, adjusted occlusion, re-torque protocol. No further issues.
Example 2: Angulated channel chip
An anterior hybrid abutment crown chipped around a sharply angled access. The redesign added 0.3–0.5 mm bulk and softened the internal line angles; the access was moved slightly palatal by tweaking the channel vector. Outcome: stable.
Example 3: Chronic loosening
The same molar returned twice with a loose screw. Root causes: no re-torque, uncoated third-party screw, steep working inclines. Fix: OEM coated screw, re-torque at 10 minutes, flatten inclines; problem solved.
FAQs
1) How tall should the ti-base abutment be?
Aim for 4–6 mm of wall height when possible. Ti-base height retention improves dramatically with each additional millimeter of engaged wall.
2) What’s the best ti-base bonding protocol for zirconia?
Air-abrade zirconia, apply MDP primer zirconia to titanium (MDP-containing primer), air-abrade and prime the titanium with a metal/MDP primer, then bond with dual-cure resin cement for ti-base.
3) Can I use self-adhesive resin cement?
Not recommended as a stand-alone strategy at this interface. Use adhesive protocols with primers (MDP for zirconia; silane for LDS) and a dual-cure cement.
4) What are safe sandblasting parameters ti-base?
Commonly 50 μm Al₂O₃ at ~1–2 bar (15–30 psi) for 5–10 seconds, ~10 mm distance, moving. Follow the device IFU and avoid over-abrading.
5) How do I prevent screw loosening in a hybrid abutment crown?
Clean threads, torque to spec, re-torque after 5–10 minutes, optimize occlusion, and consider coated OEM screws and occlusal guard for bruxers.
6) Lithium disilicate or zirconia for ti-base cases?
Both work. Zirconia is less technique-sensitive for posterior loads; LDS offers superior esthetics but demands strict etch-and-silane protocols and adequate wall height.
7) Can the lab bond the unit for me?
Yes. Many labs—Associated Dental Lab included—offer lab-bonded hybrid abutment crown workflows or will return the ceramic and ti-base abutment pre-treated for your chairside bonding, depending on preference.
Conclusion
Ti-base success isn’t mysterious; it’s methodical. Choose adequate ti-base height retention and true wall engagement, prepare clean surfaces, honor the right chemistry (MDP for zirconia, silane for LDS), use the correct resin cement for ti-base, observe conservative sandblasting parameters ti-base, and finish with disciplined screw loosening prevention. Do those things consistently and your hybrid abutment crown cases will seat easily, stay quiet, and last.
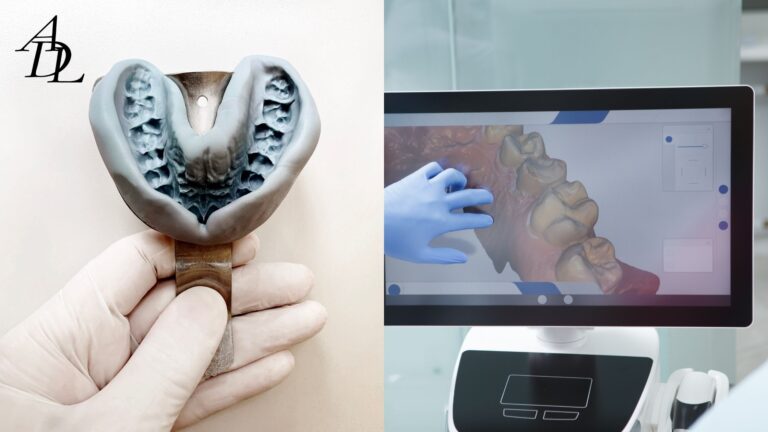
About Associated Dental Lab
Associated Dental Lab is a dentists’ trusted Full-Service Dental Lab in Los Angeles. They accept scans from major IOS platforms, provide a streamlined Send-a-Case process with local pickup and prepaid shipping, and fabricate restorations in-house for dependable turnaround. If you want a team fluent in ti-base abutment workflows—from design libraries to chairside bonding kits—contact Associated Dental Lab and send your next case with confidence.